Hubs & Wheel Bearings
Front Hubs & Bearings - Tavs.50-51
New Paragraph
Tav. 51 Series II Cars
Detail from Tav. 50 Series II Cars
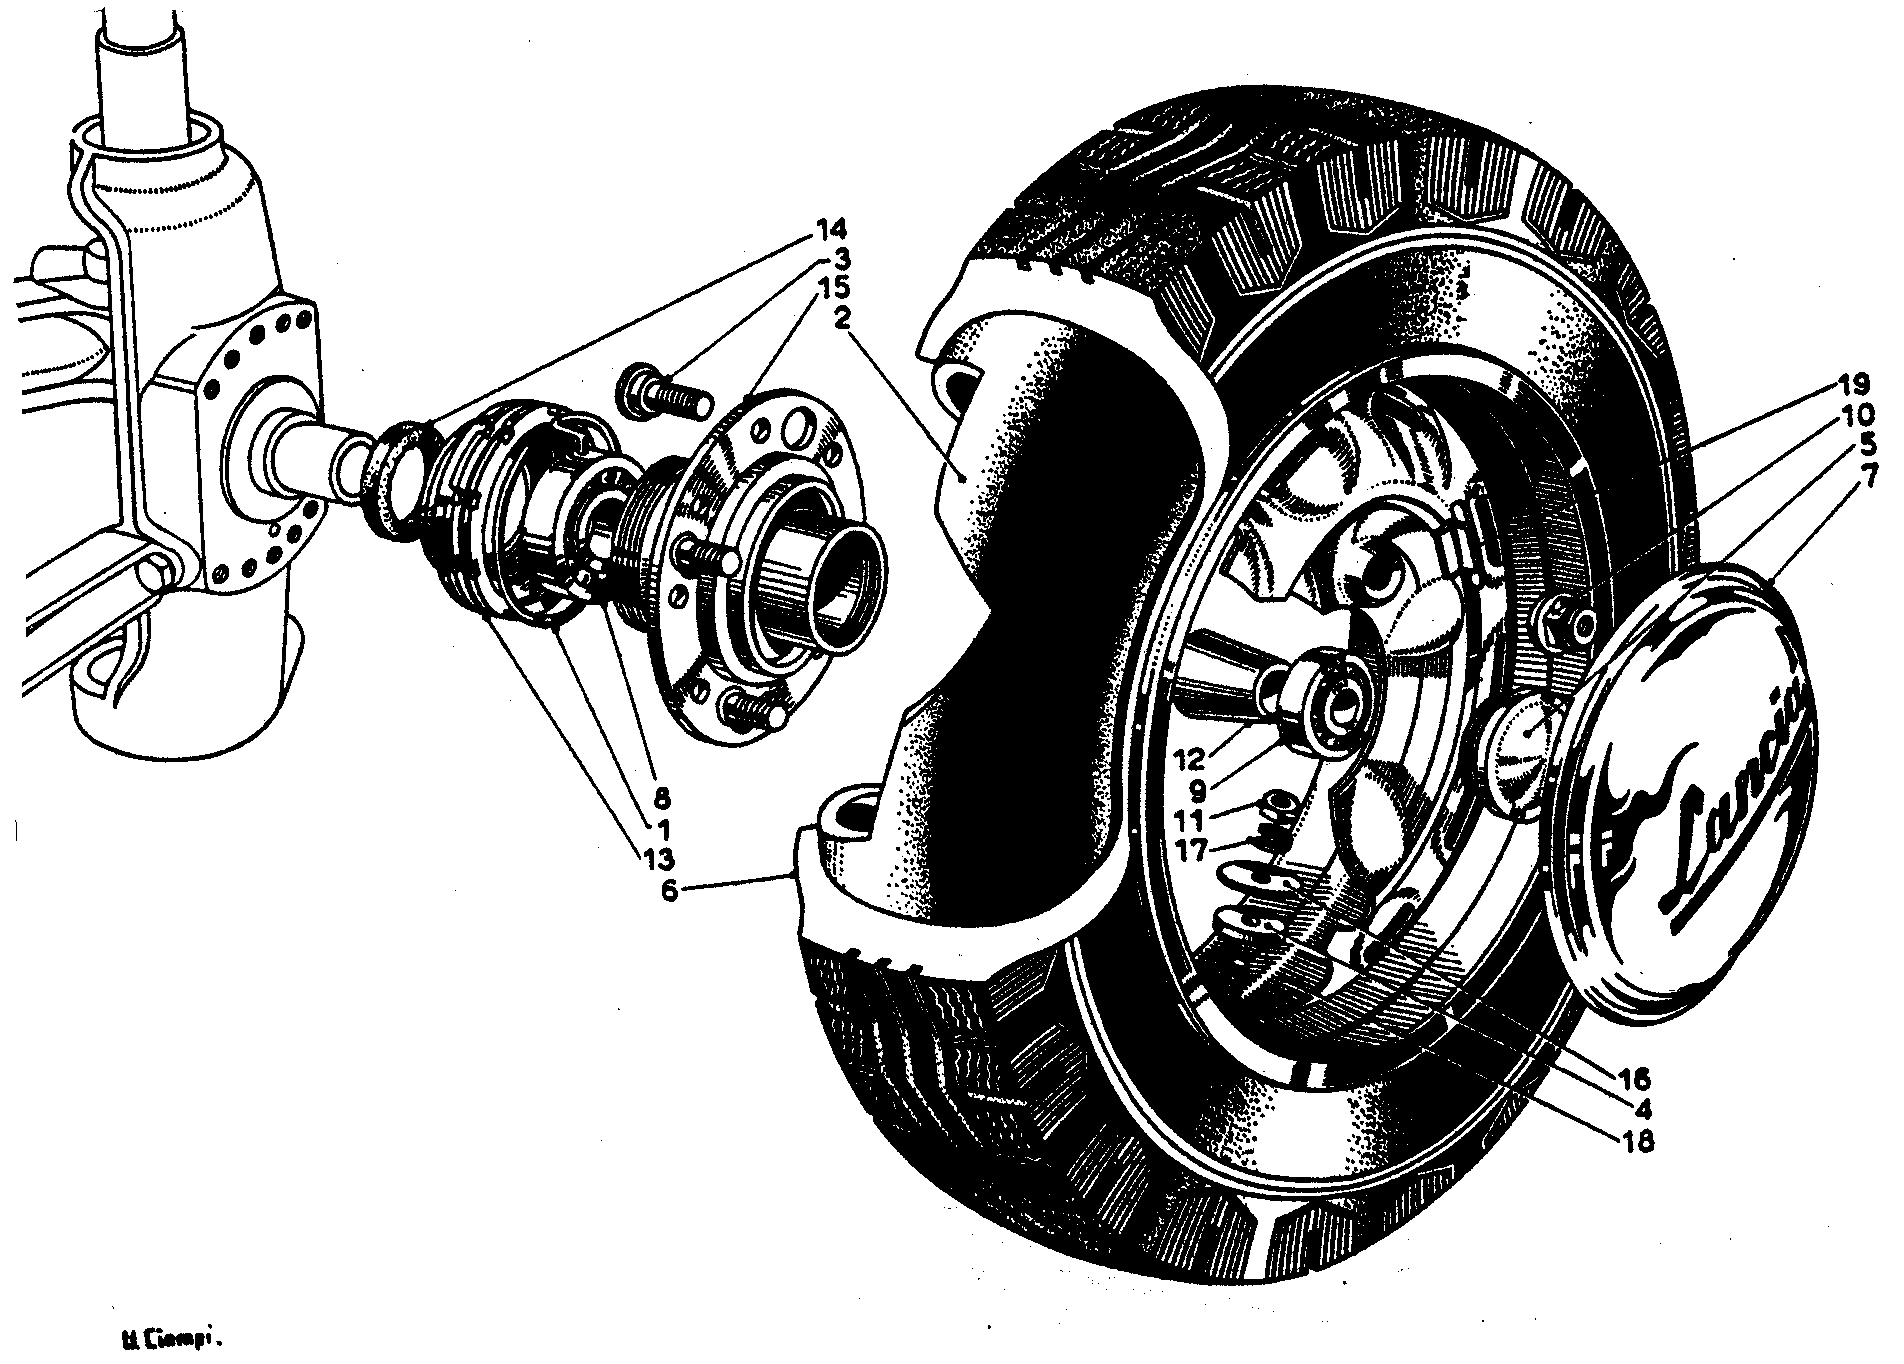
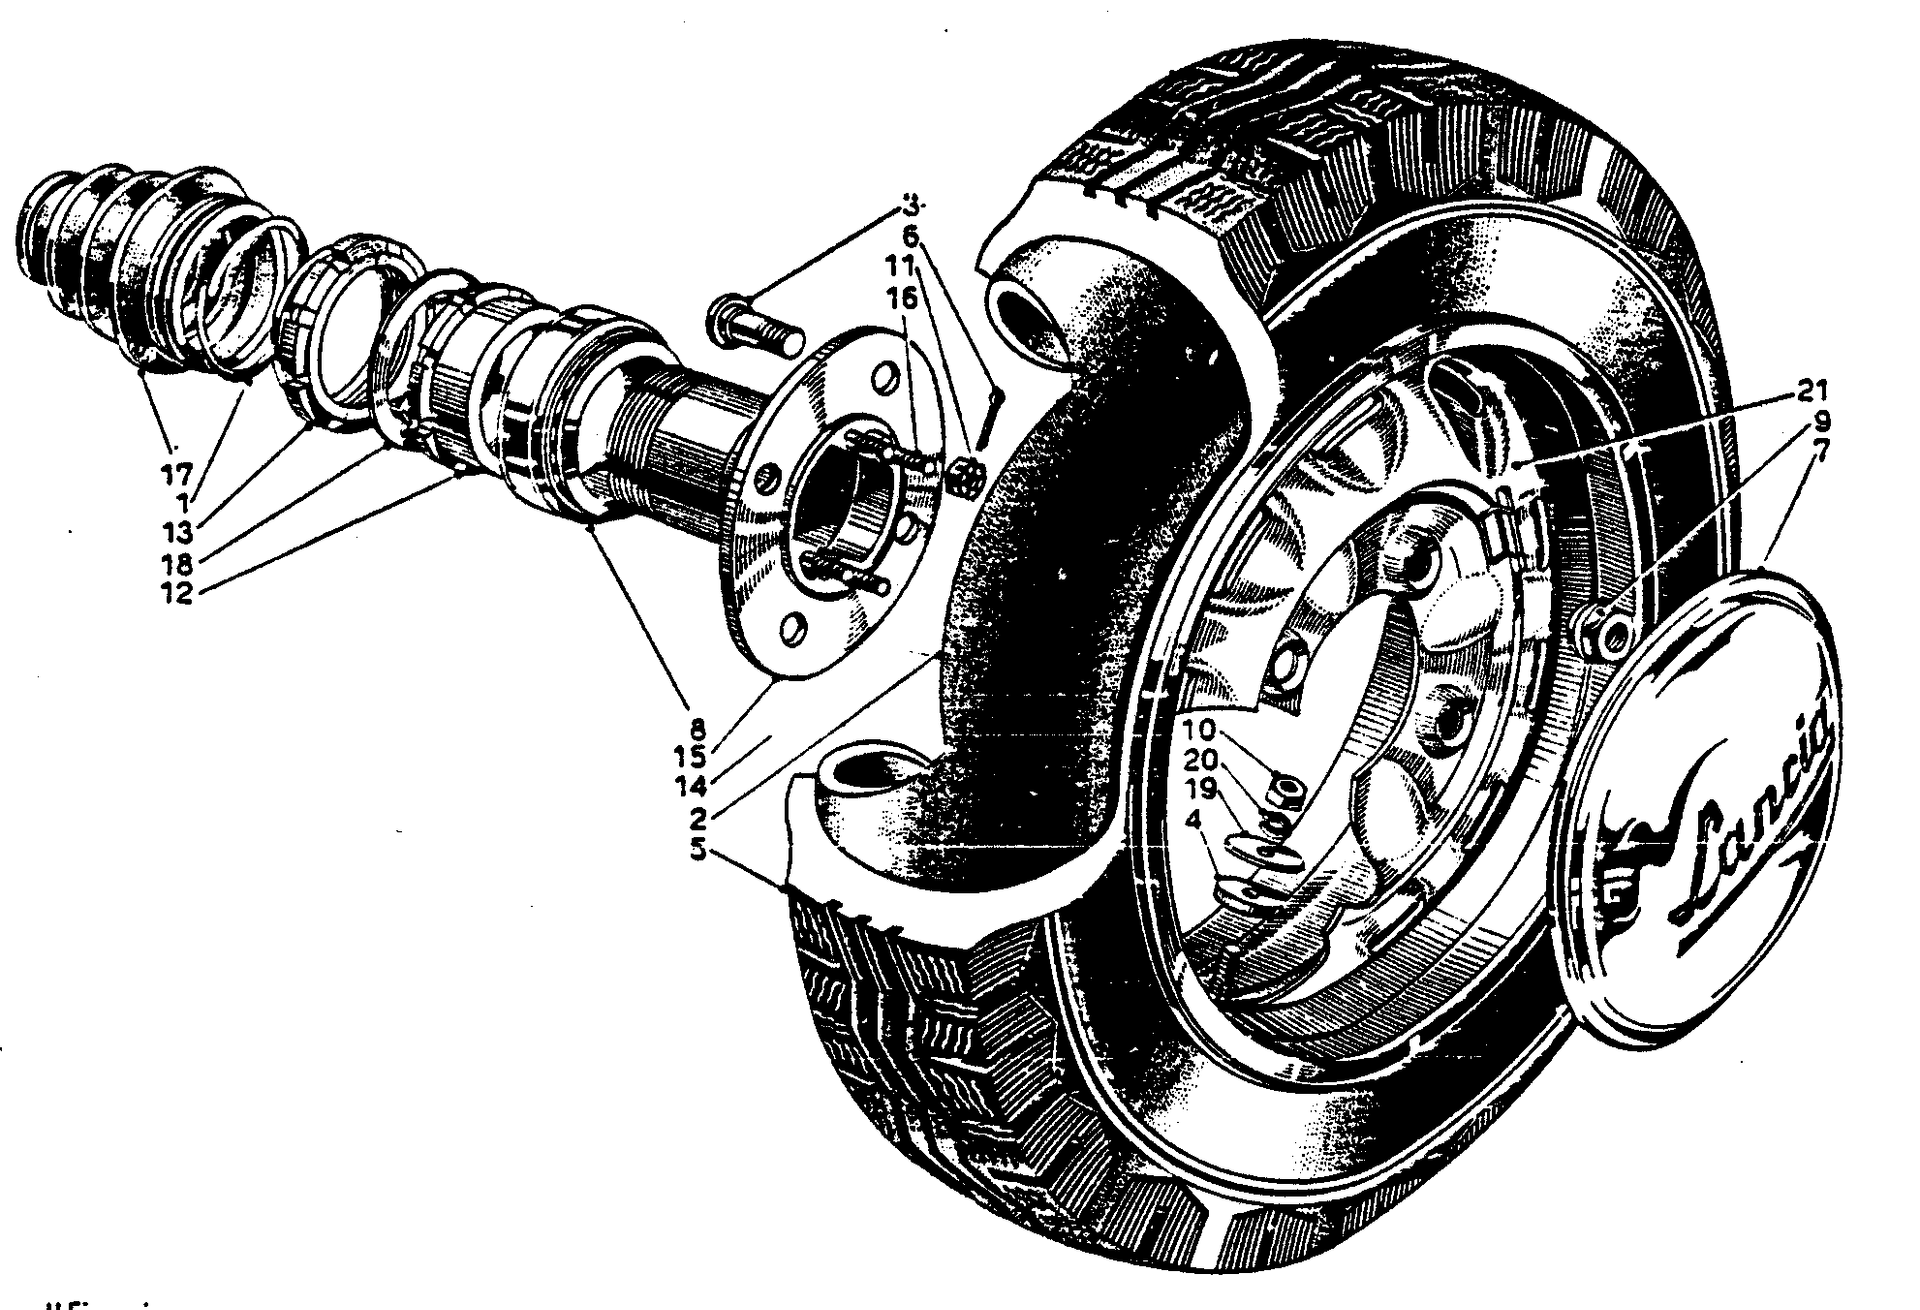
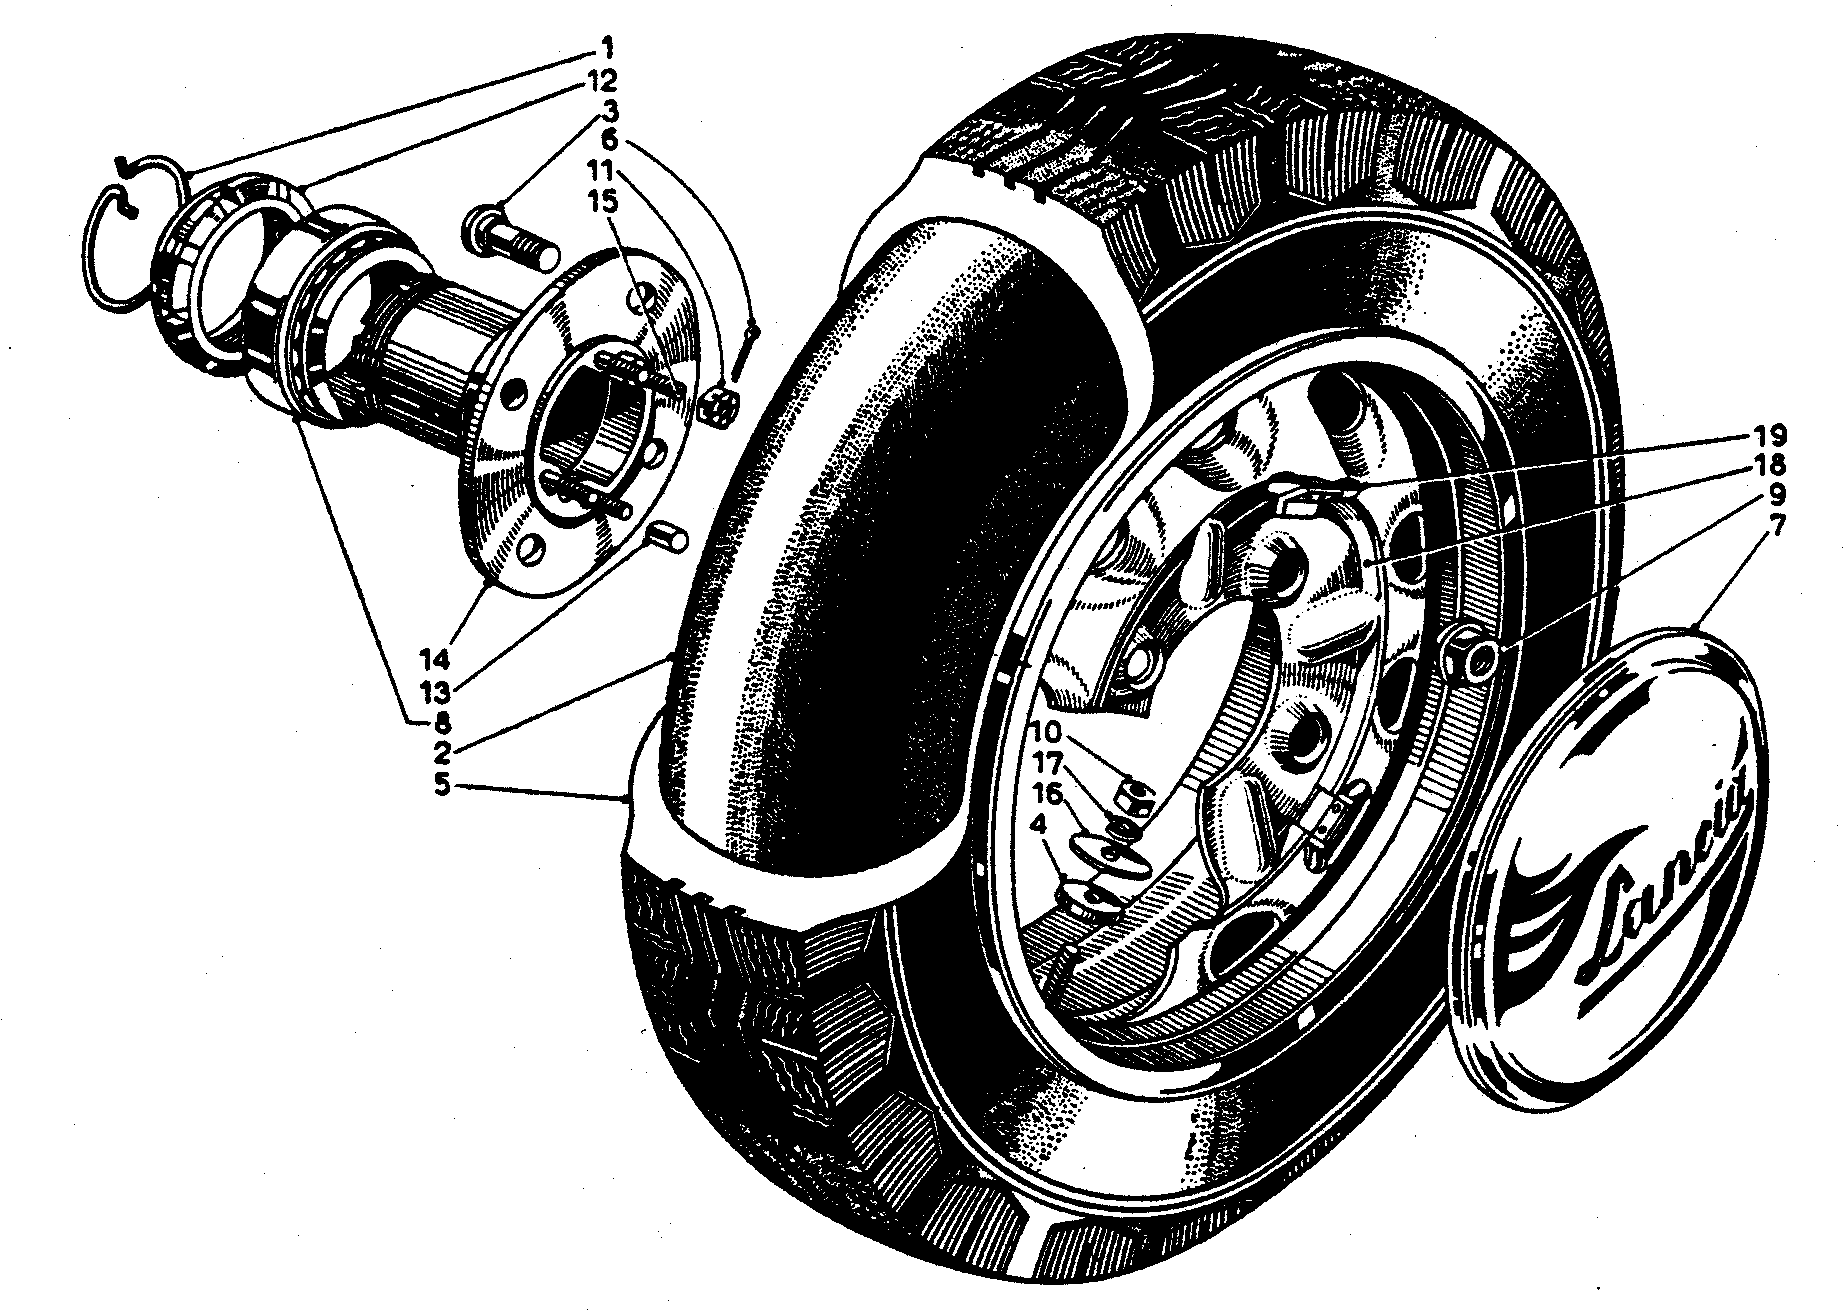
Series I and II cars had identical front hubs. See Tav. 51 below and Tav.50 on page 04.1/0.
Tav. 51:
The hub runs in two ball races:
#8 Inner race RIV 7B (Lancia 48008), 72 mm od, 30 mm id, 19 mm wide
#9 Outer race RIV 5B (Lancia 48051) 52 mm od, 20 mm id, 15 mm wide
There is an oil seal #14 at the rear of the stub.
Hub Removal
The wheel can be left attached to the hub #15 as it may help removal. The wheel should be removed if a puller is used – see Task 6 below.
- Back off the front brake adjusters fully
- Remove also nave-plate #7 and wheel
- Remove hubcap #5 by tapping off or using correct tool. Note that the cap is made of alloy and is easily damaged.
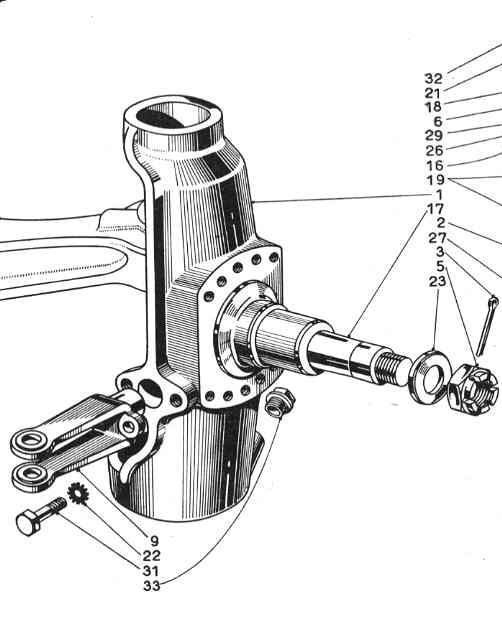
- Remove nut #5 (mm) and split pin #3 (See Tav.50) and thrust washer #23.
- Use puller to remove hub and drum. The factory-style puller screws into the threads of the hubcap (#5 in Tav.51) and a centre screw removes the hub. The alternative type is a hoop, which bolts on the wheel studs.
- On reassembly, nut #5 (Tav. 50) securing hub to stub axle is torqued to 137.4 ft.lbs. or 186.3 N.m (Tool 8091147).
Rear Hubs & Bearings
Series I Rear Hub and Wheel – Tav.52
The Series I rear hub differs from the Series II owing to the change of rear suspension in the latter. The rear wheel bearing was the same for both:
RIV 03/02/3057 (Lancia 49323) 120 mm o.d, 74 mm i.d 25/34 mm wide. This bearing is now not easy to obtain (2004).
Removal of the hub involves no interference with the brakes, as these are mounted in-board at the trans-axle unit.
Lubrication is by a greaser on the inside of the wheel located on the hub carrier. Refill every 9000 km with a multi-purpose grease.
Series II Rear Hub and Wheel – Tav. 56
“Tips for Aurelia Owners” by Brian Long – Replacing Aurelia Rear Wheel Bearings
Published in the American Lancia Club’s “Lanciana” June/July 1980.Reprinted in UK Lancia Motor Club Journal Summer 1985. Retyped with minor editorial changes PM 23rd March 2007
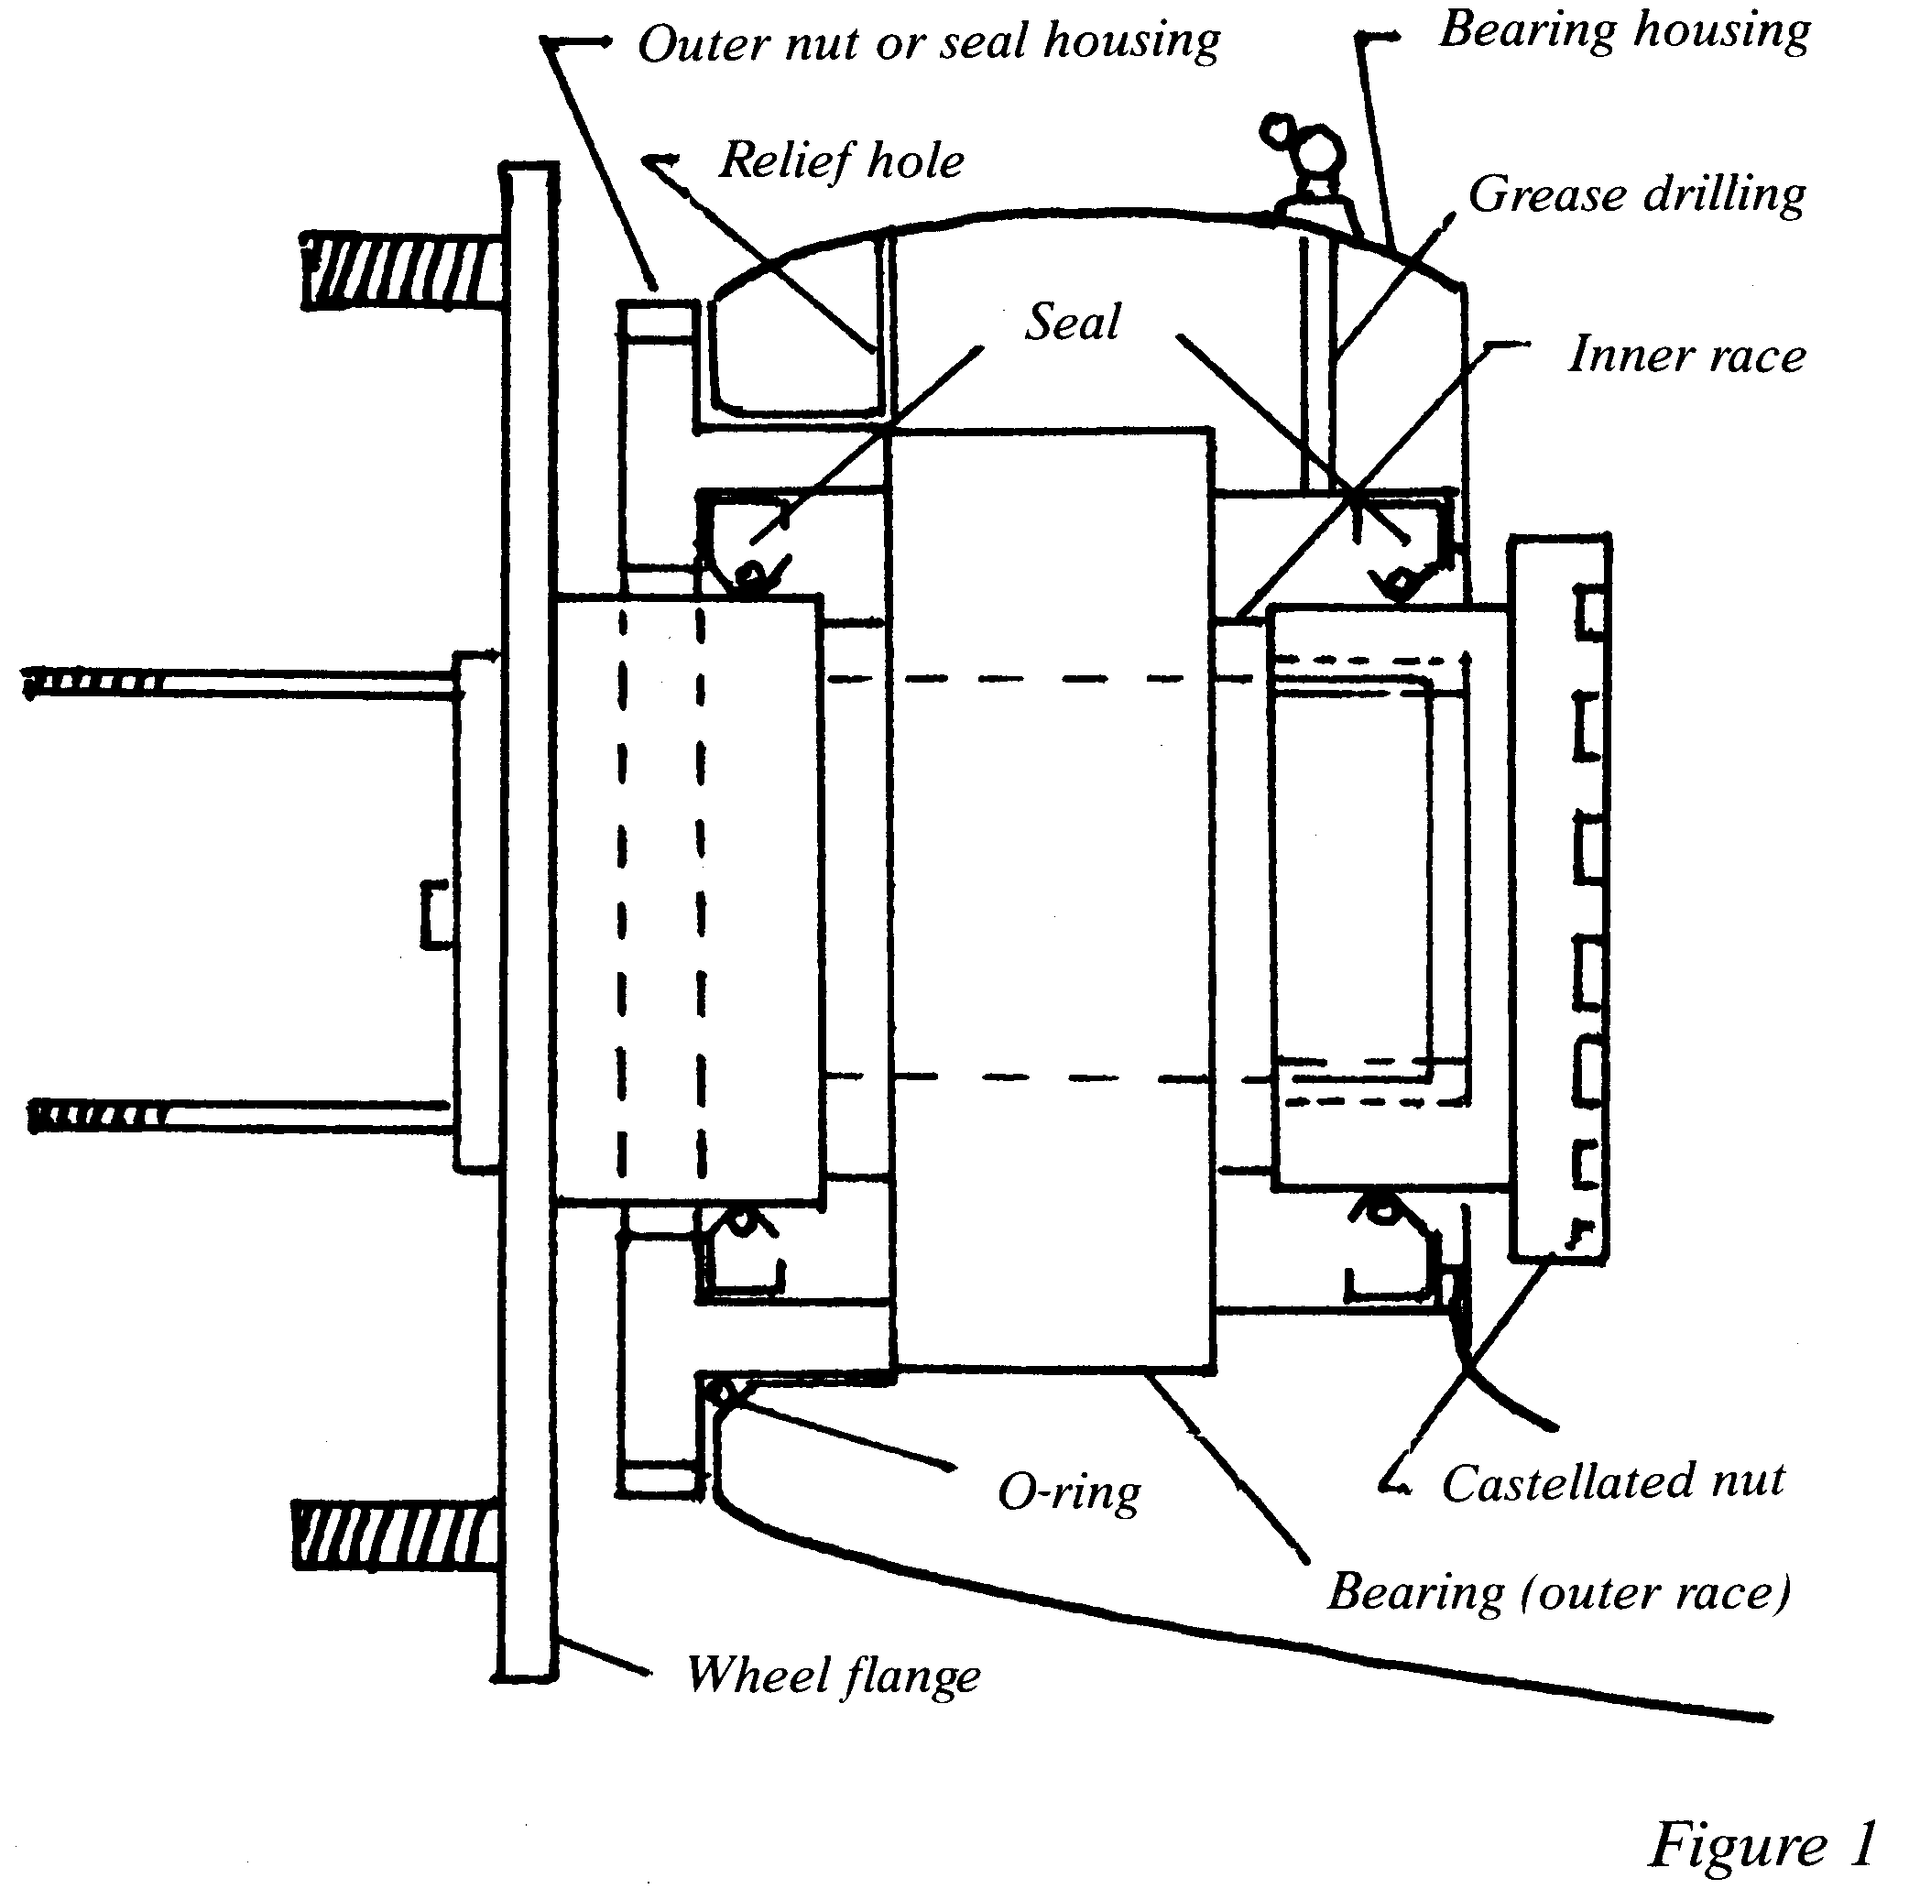
These virtually unobtainable bearings will wear with time. Jacking the car up and rocking the wheel will indicate wear, as will a ‘moaning’ sound, or even ‘rear wheel steering’ in extreme cases when on the road. The construction of the hub and bearing is shown in Figure 1. See also Tavs. 52 & 56 above & the notes on bearings in Data on Bearings, Balls & Valves, Silent blocs & Rubber Buffers.
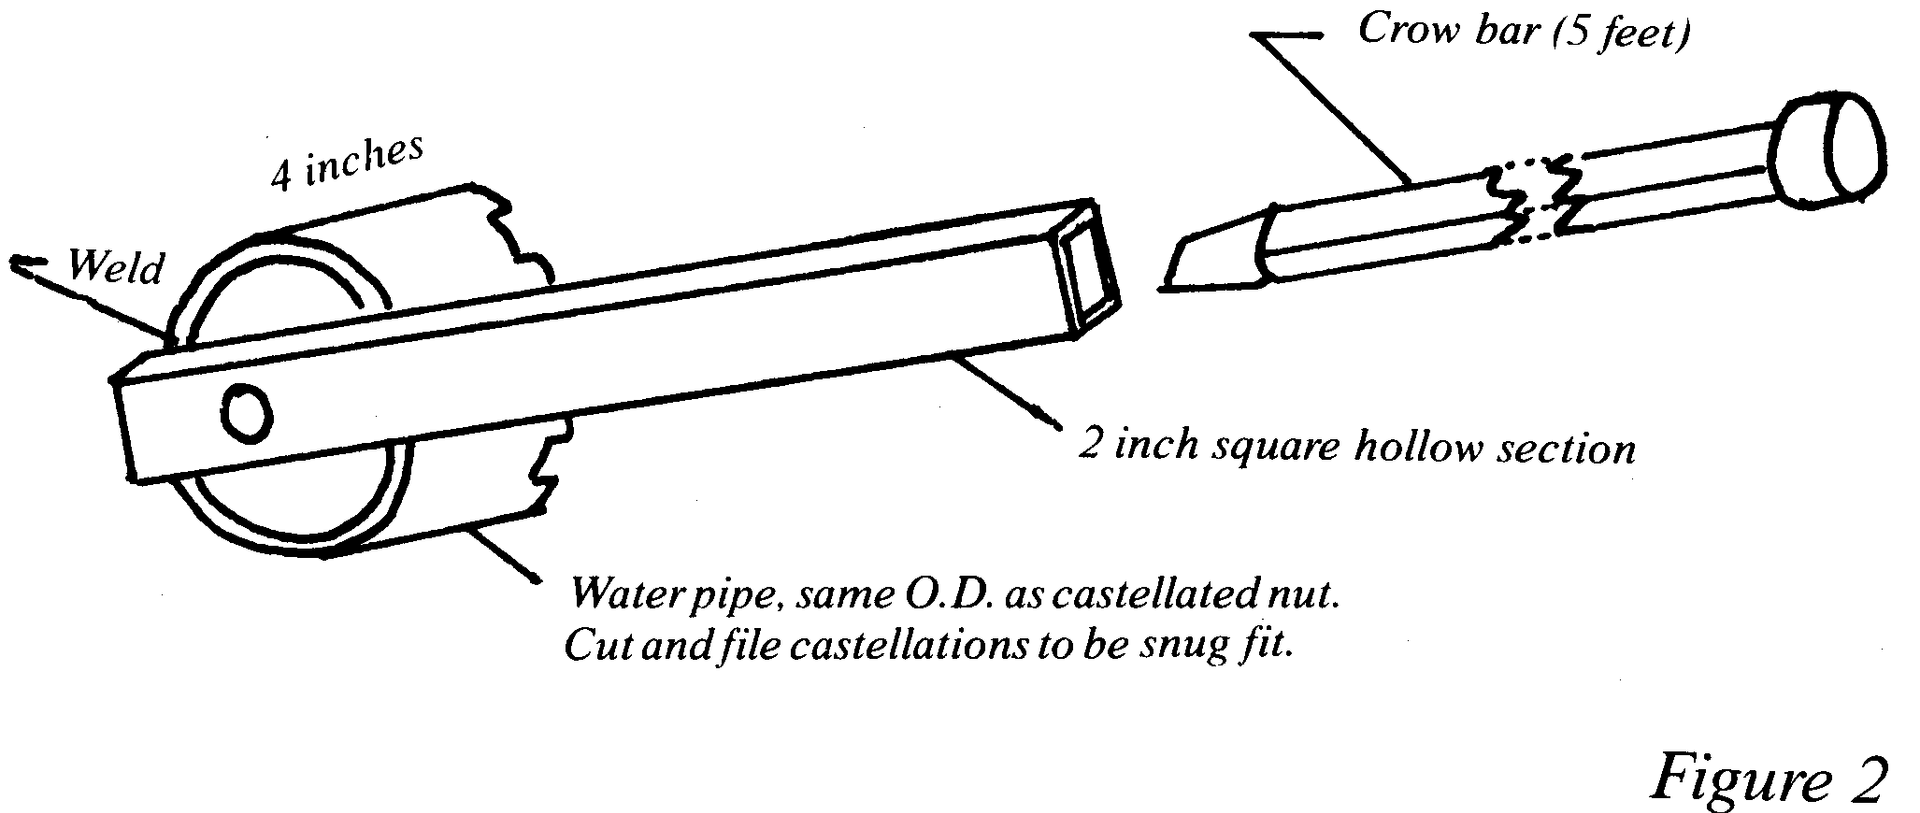
I’m convinced that all jobs on a Lancia are worth making the correct tools for and this job is one that cannot be done without them. I made up a special tool to enable a crowbar to be used when undoing the inner castellated nut, see Figure 2. I also made a simple bracket which, when bolted to a 6-foot fence post (!) was used to hold the wheel flange, see Figure 3.
Because of the left- and right-handed threads on the inner castellated nuts on the left hand and right hand hubs respectively, I had to locate the axle to one side or the other of the bracket depending on the torque reaction needed.
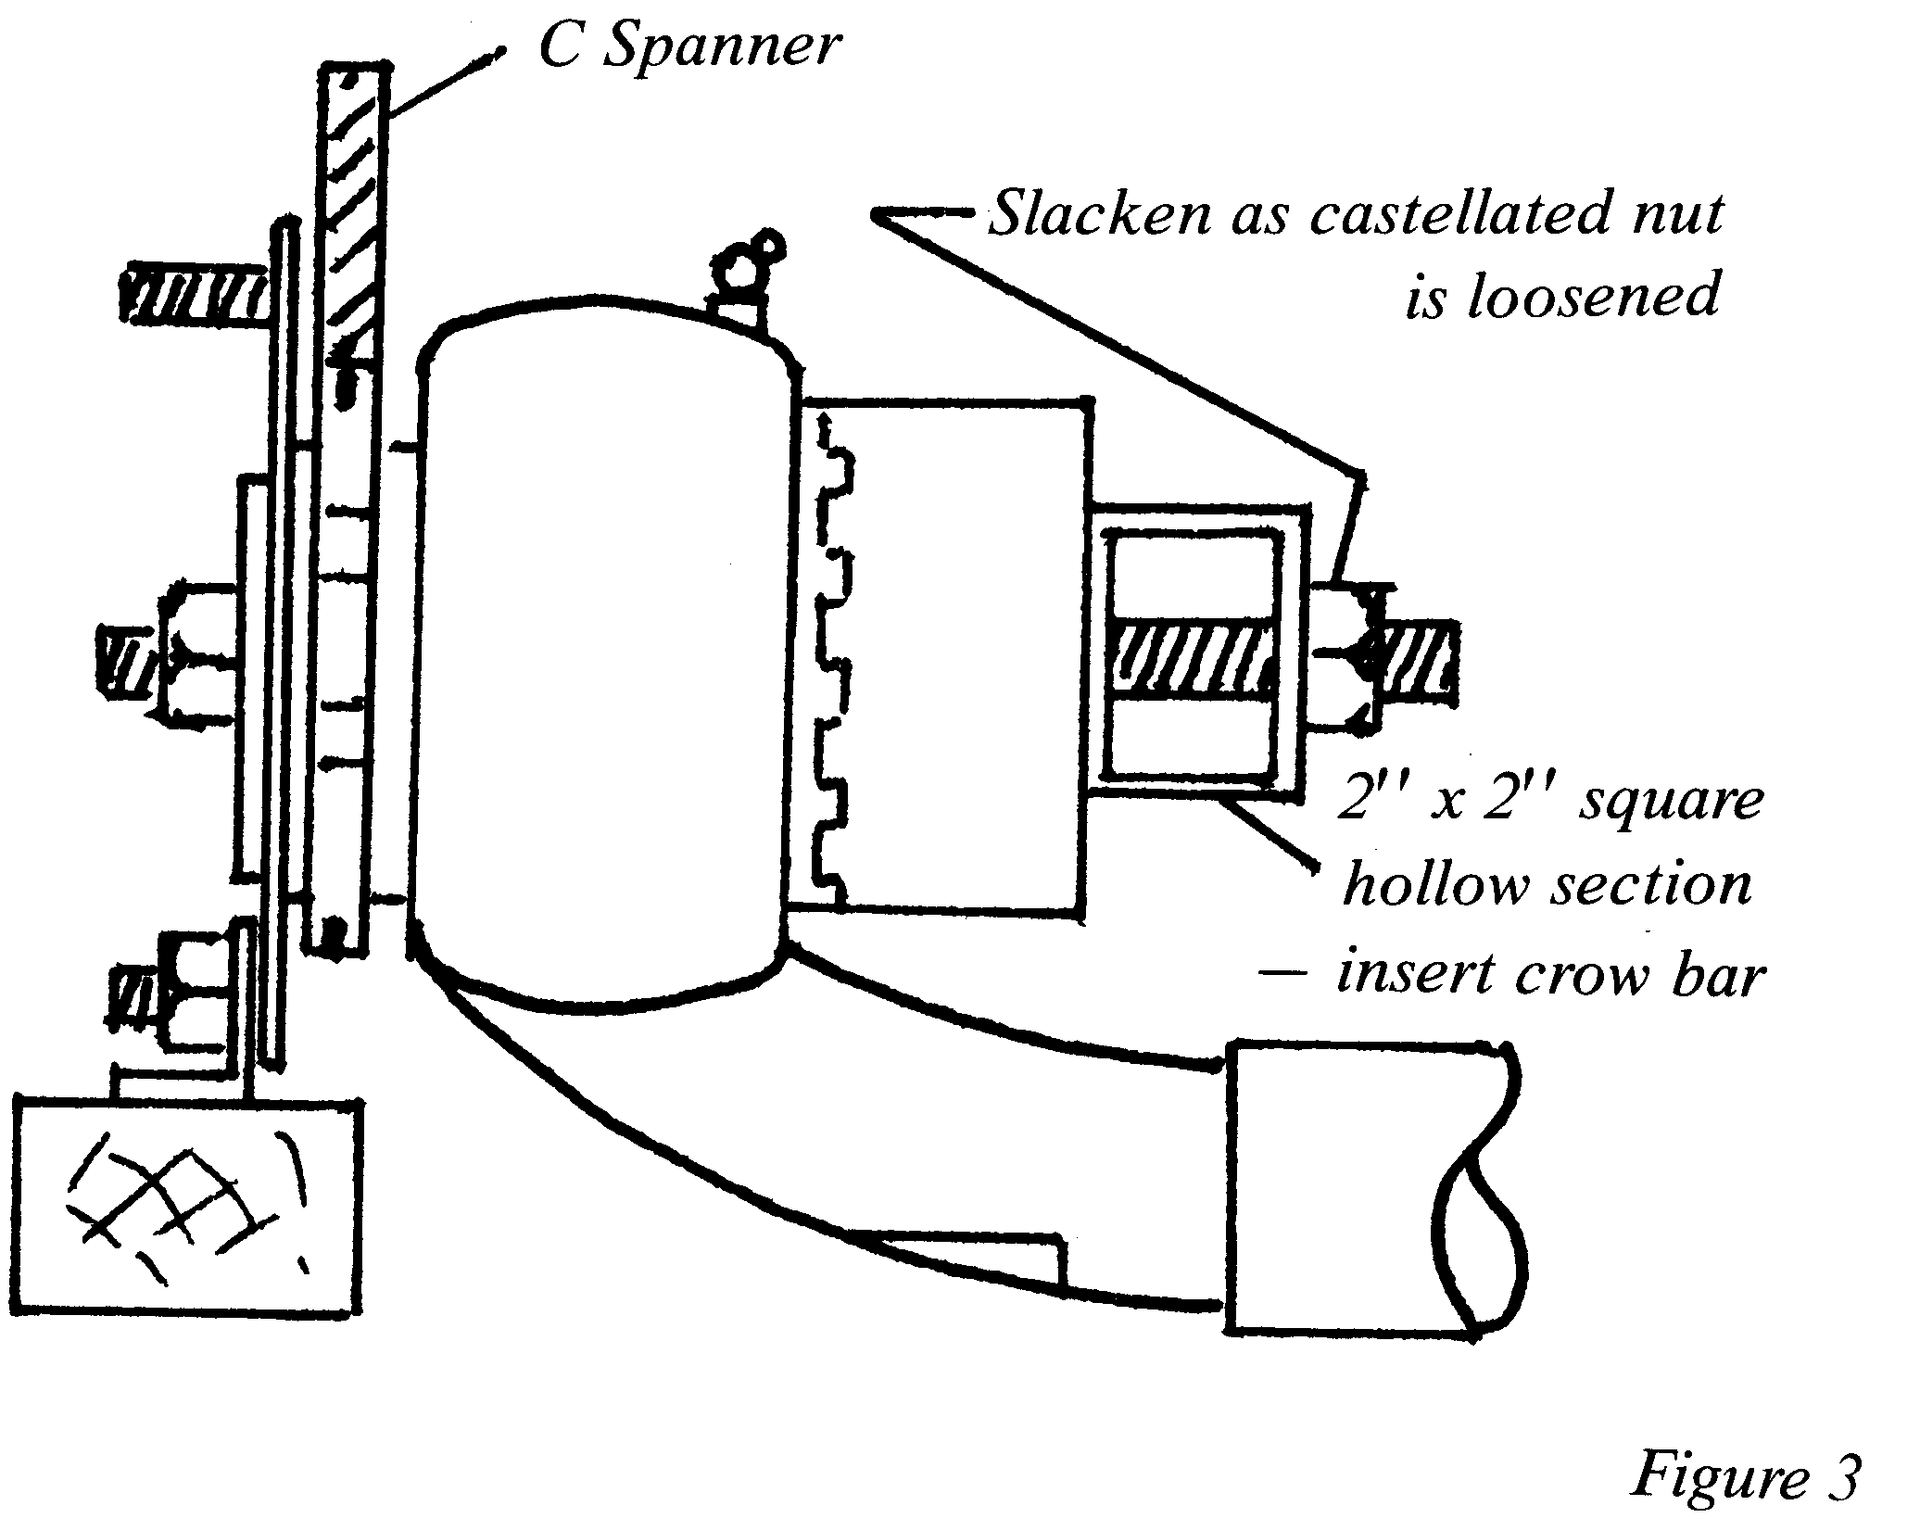
Once out of the car, the housings can be cleaned up and the various wire lock rings removed before disassembly. Bolt the wheel flange to the bracket and bolt the castellated tool to the inner nut. Put a crowbar on the square section and heave. Once loose, it can be run right off.
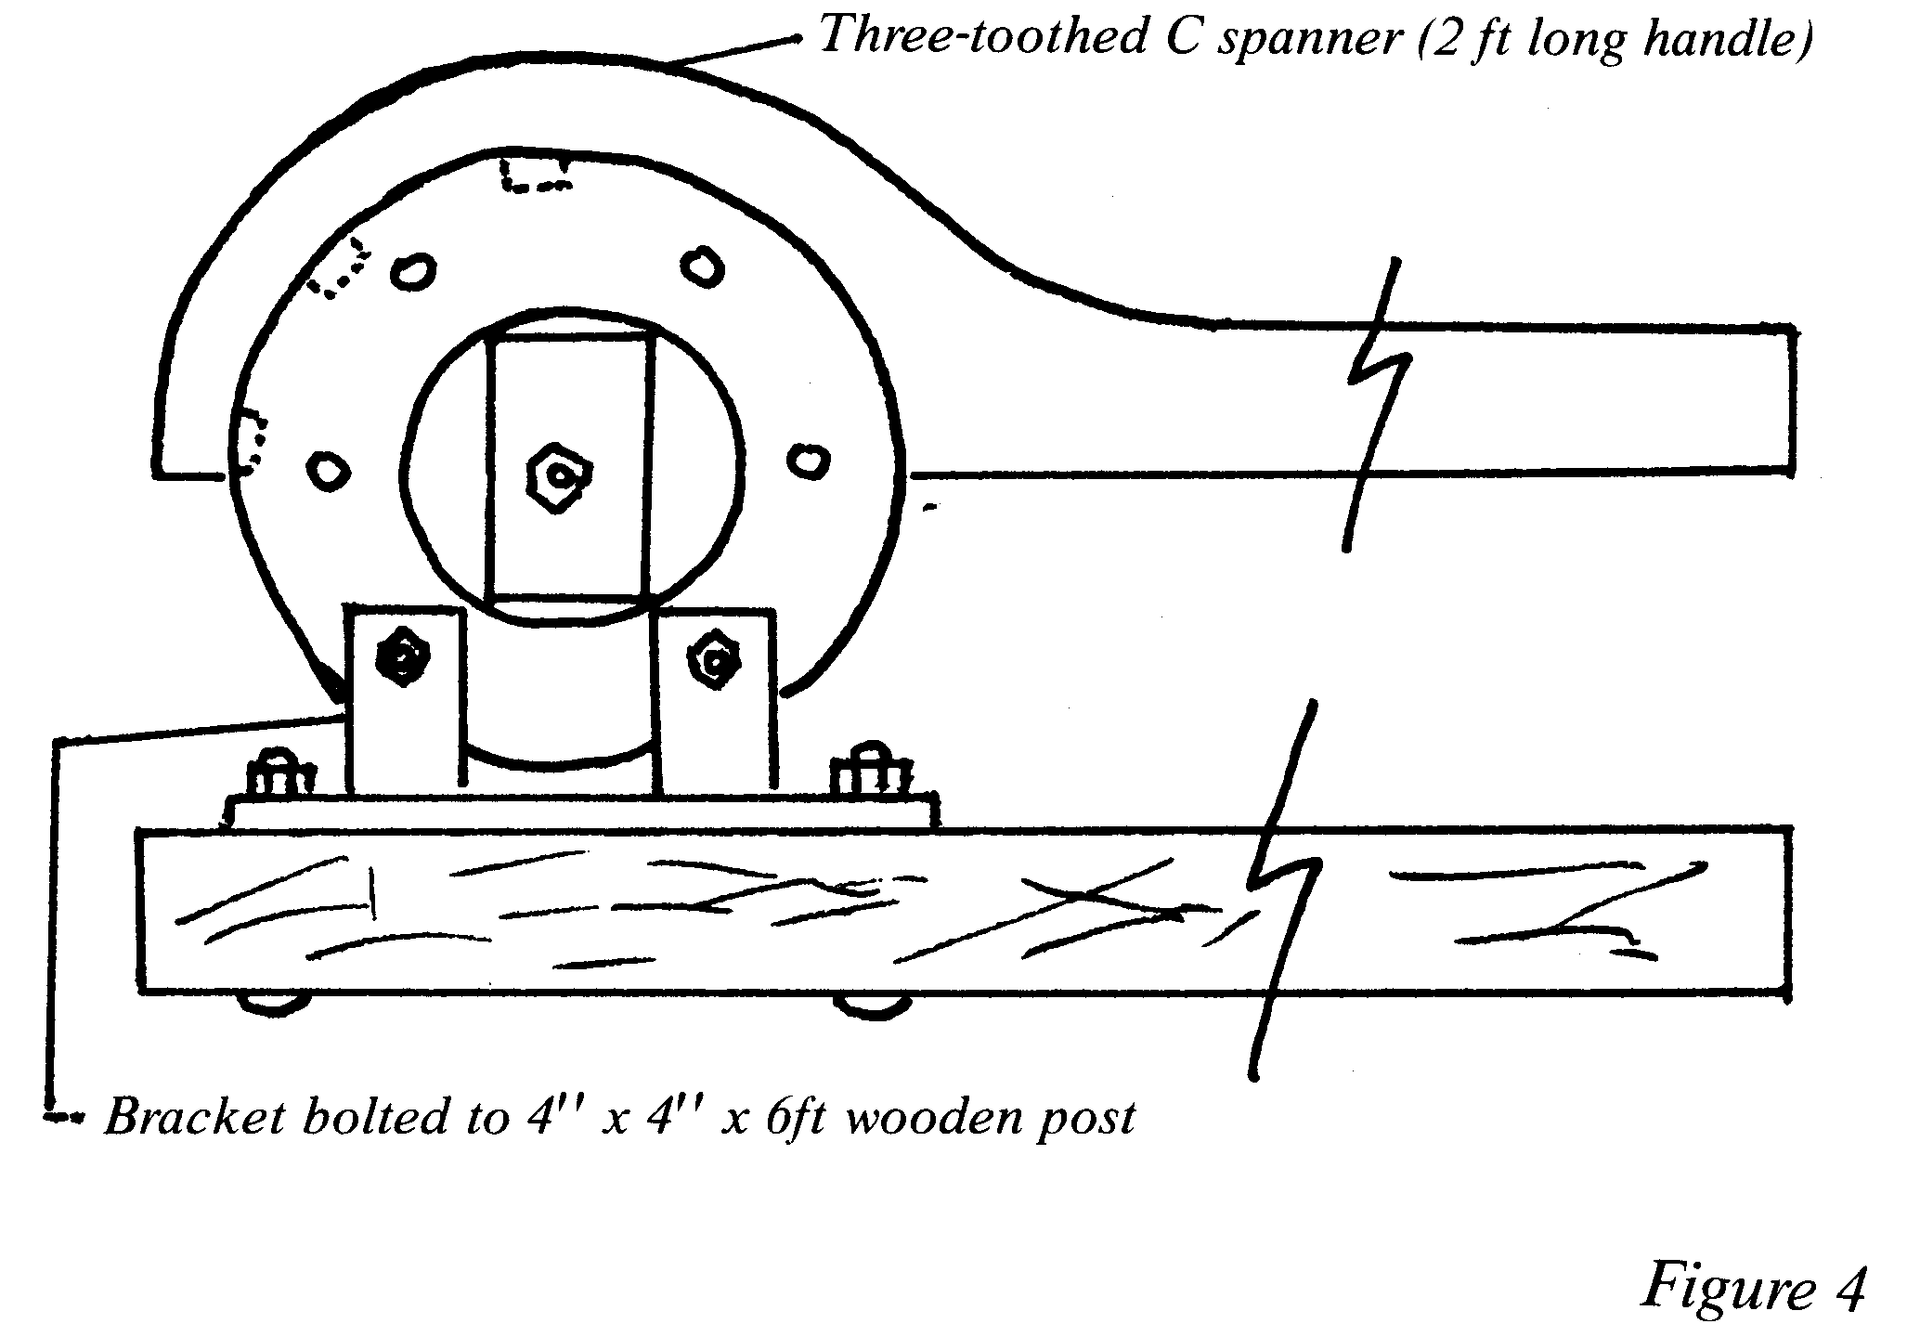
Use a C spanner to loosen the other castellated nut (seal carrier), see Figure 4. As this is undone it will bear up on the back of the wheel flange and begin to extract the bearing from its housing.
Now the tricky part. The outer race seems to be a snug fit in the housing, but the inner races are quite tight on the hub. Using two tyres levers under the castellated seal carrier you will be able to ease the bearing off the hub – usually in pieces as it will come apart in the process. When these bearings do come apart they seem to sustain some damage to the races so this procedure assumes the bearing is being replaced, but care must be taken when fitting a new bearing – see below.
Clean the bearing housing etc., and fit the new seals. Check the surfaces on which the seals bear. If worn they will need rebuilding.
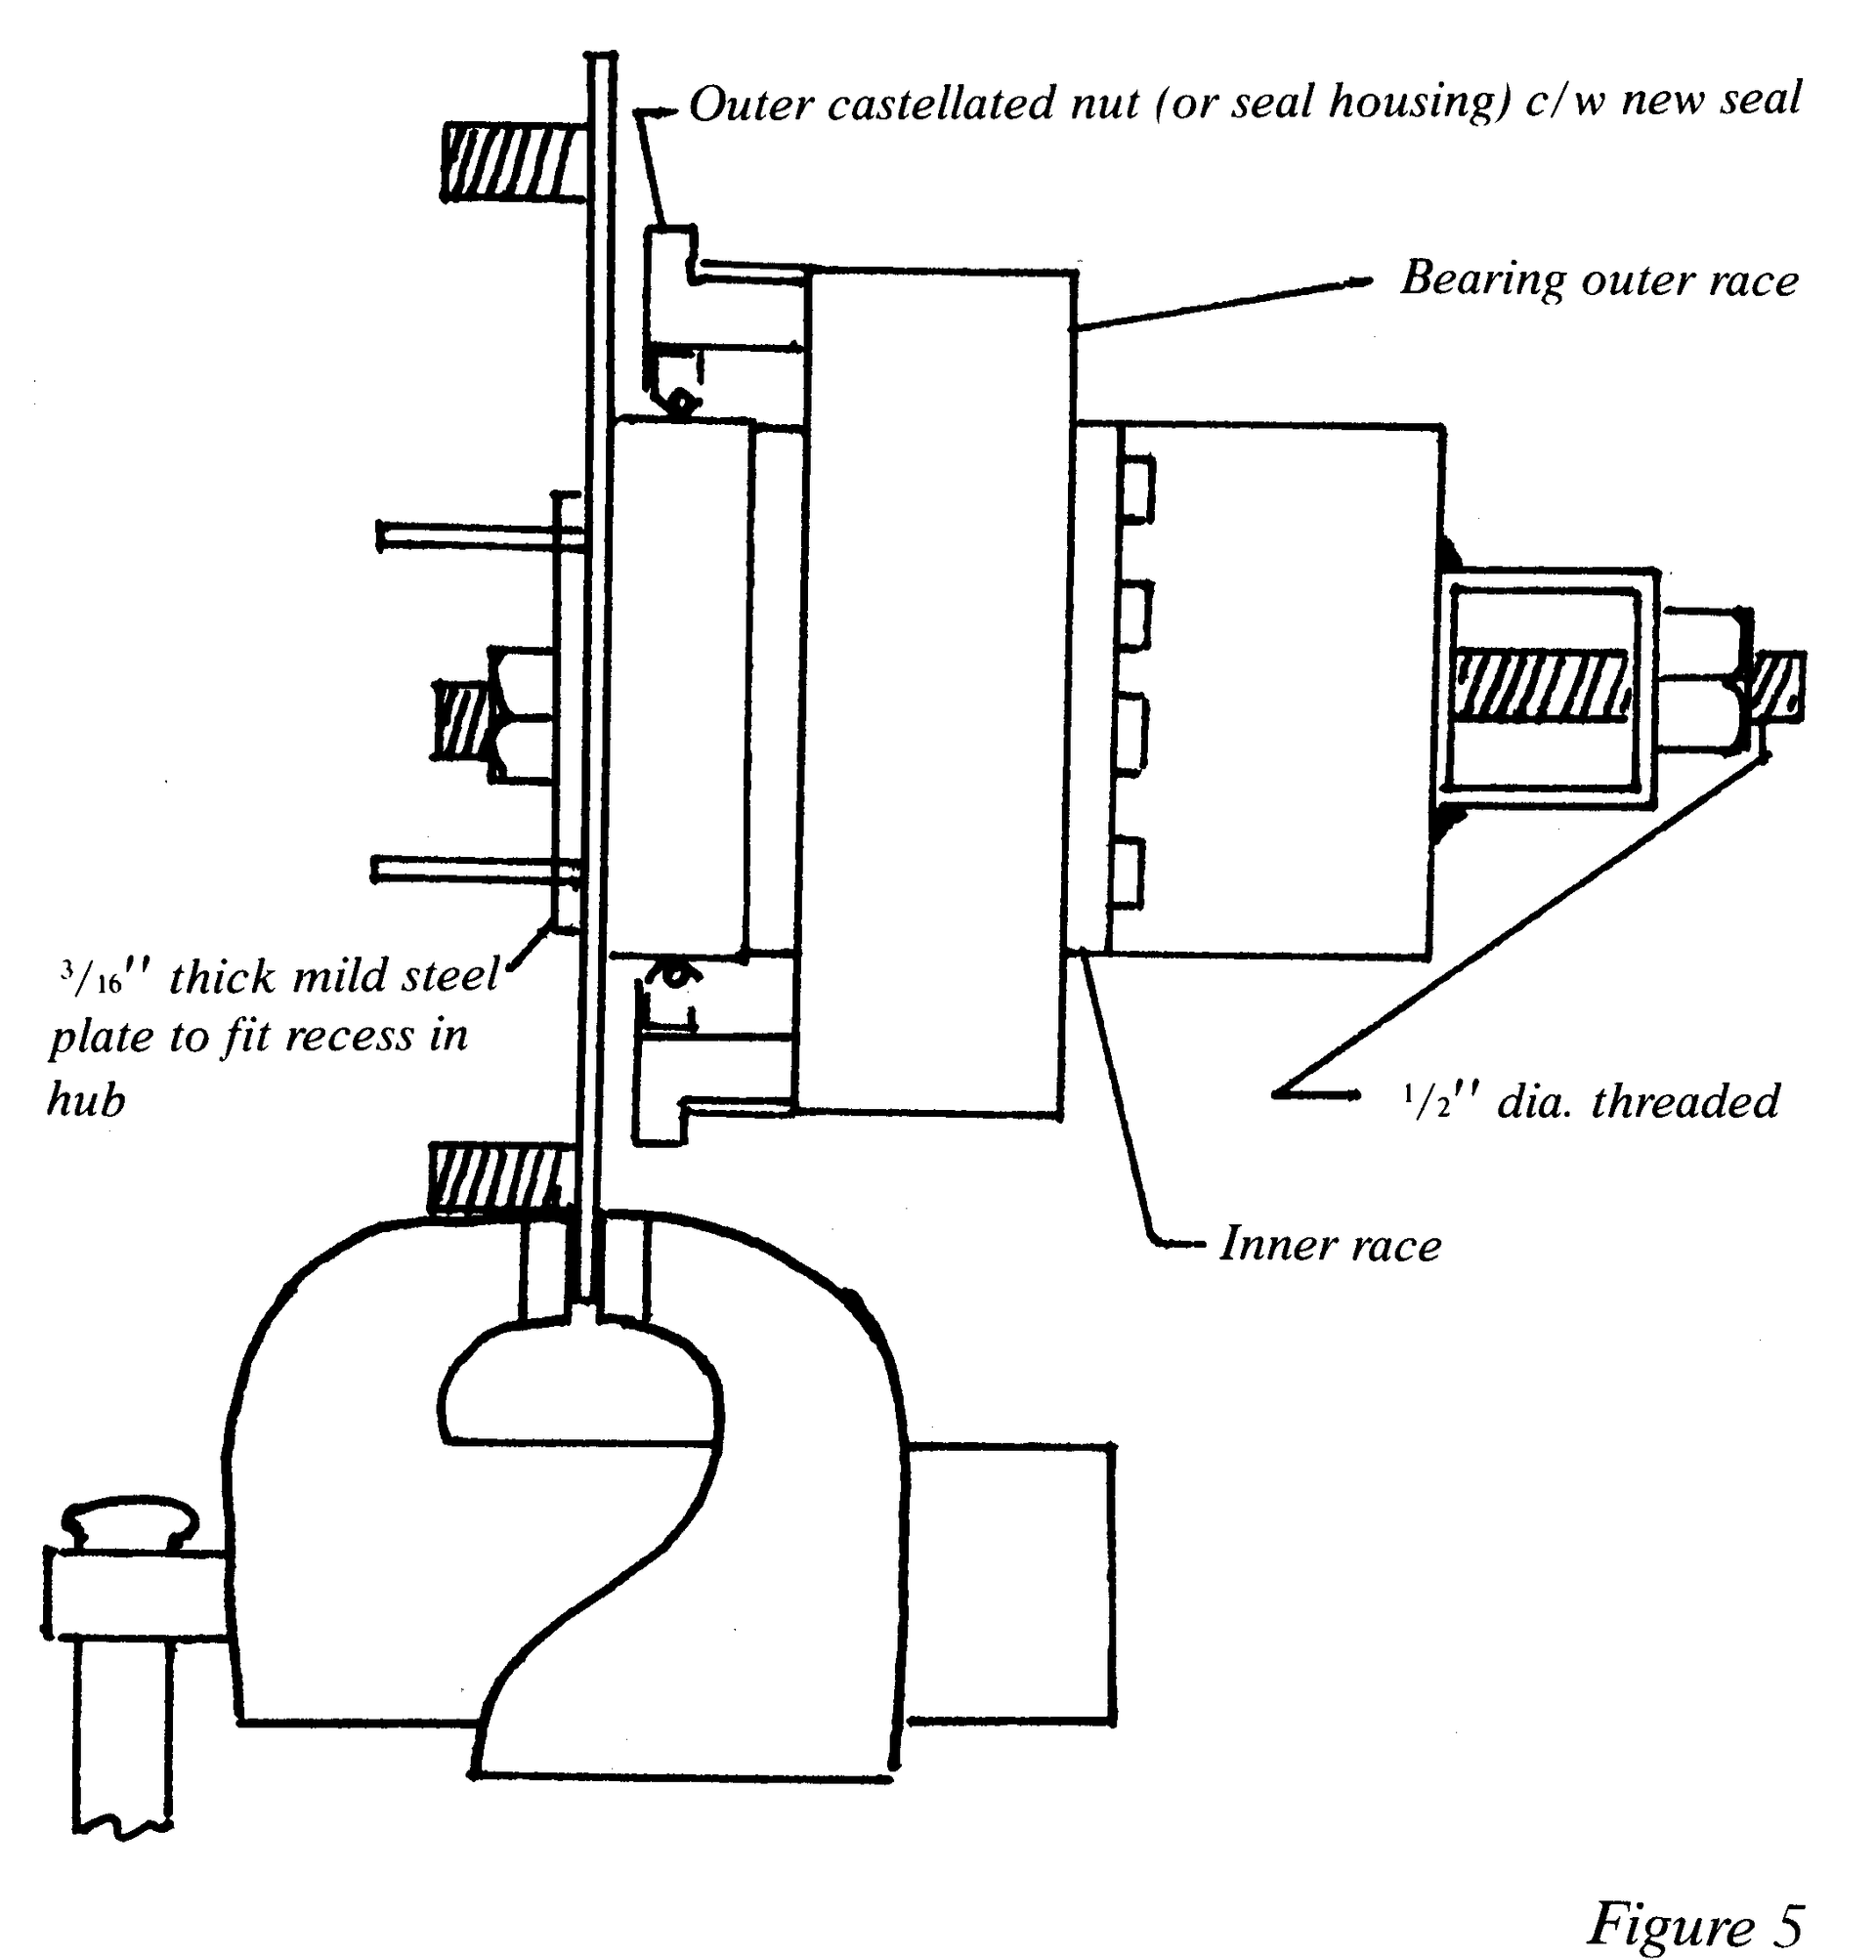
To reassemble, clamp the wheel flange in a vice and slip on the outer castellated seal housing with its new seal & ‘O’-ring. Offer the new bearing up to the hub and then assemble the castellated tool against the inner bearing and use it to press the bearing fully home, see Figure 5. Note that pressure is applied to the inner races this way preventing them from coming apart as they did on dismantling.
Tap the bearing/flange assembly gently into the hub until the outer castellated nut engages and can be done up fairly tightly with a C spanner. Bolt the flange back on to a fence post bracket and tighten up the outer castellated nut
Disassemble the castellated spanner, screw in the inner castellated nut, reassemble the castellated spanner and tighten up the nut. I estimate that I was pulling about 60-70 lb. on the end of the crowbar when tightening; this nut must be tight.
Refit locking wires. Use a grease gun and a good quality wheel bearing grease to repack the hubs; doing it after assembly avoids getting grease everywhere. The addition of an extreme pressure lubricant is recommended. Don’t use a molybdenum disulphide additive, as this material is not suitable for ball races.
Necessary parts and tools:
| C spanner | Castellated nut spanner with draw-bolt and plate | Wheel flange bracket |
|---|---|---|
| ‘O’-rings which can be made from correct diameter section and Superglue | Four seals – Flaseal 110x85x13 | Two RIV 64-04-9387 wheel bearings |