Doors & Windows, Seals & Fittings
SERIES I CARS – FRONT DOORS
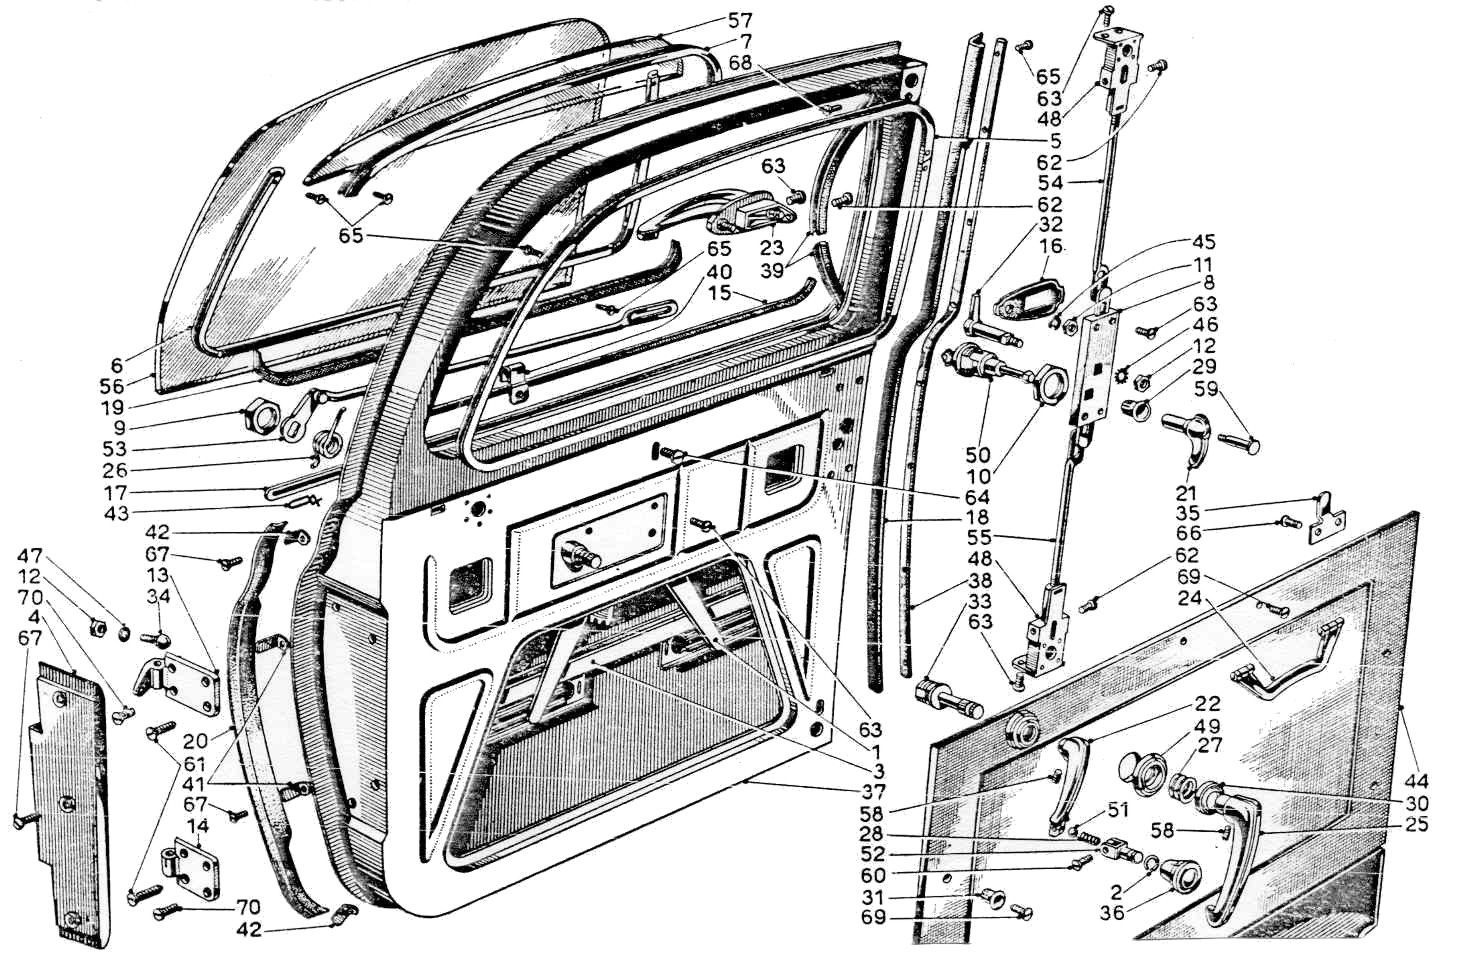
B10 Saloon Front Door [Tav.65 SI]
SERIES I CARS – REAR DOORS
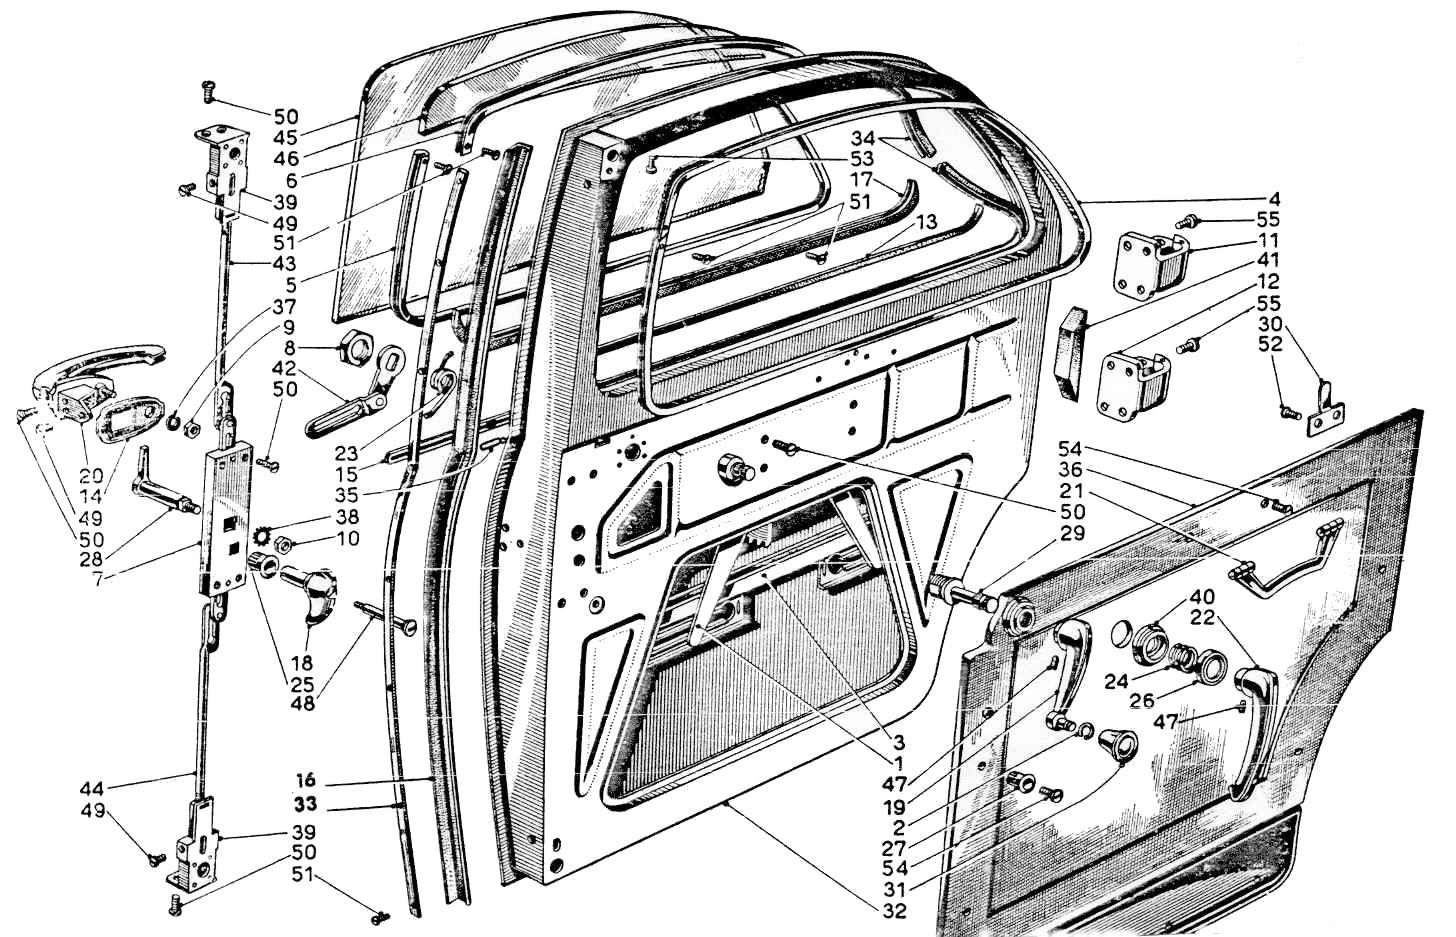
B10 Saloon Rear Door [Tav.66 SI]
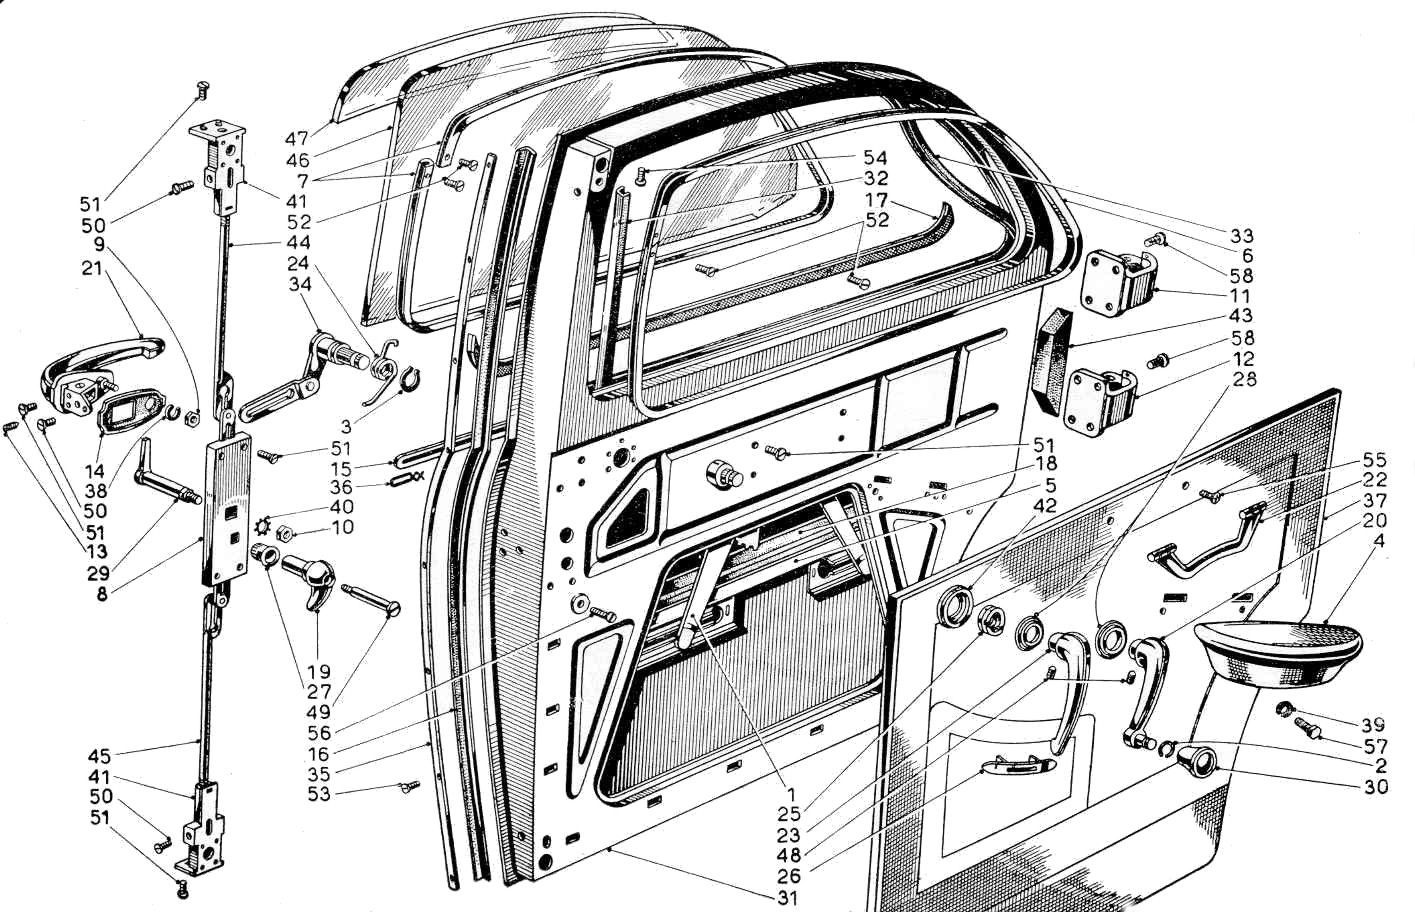
SERIES II CARS – FRONT DOORS
B12 Saloon Front Door [Tav.66 SII]
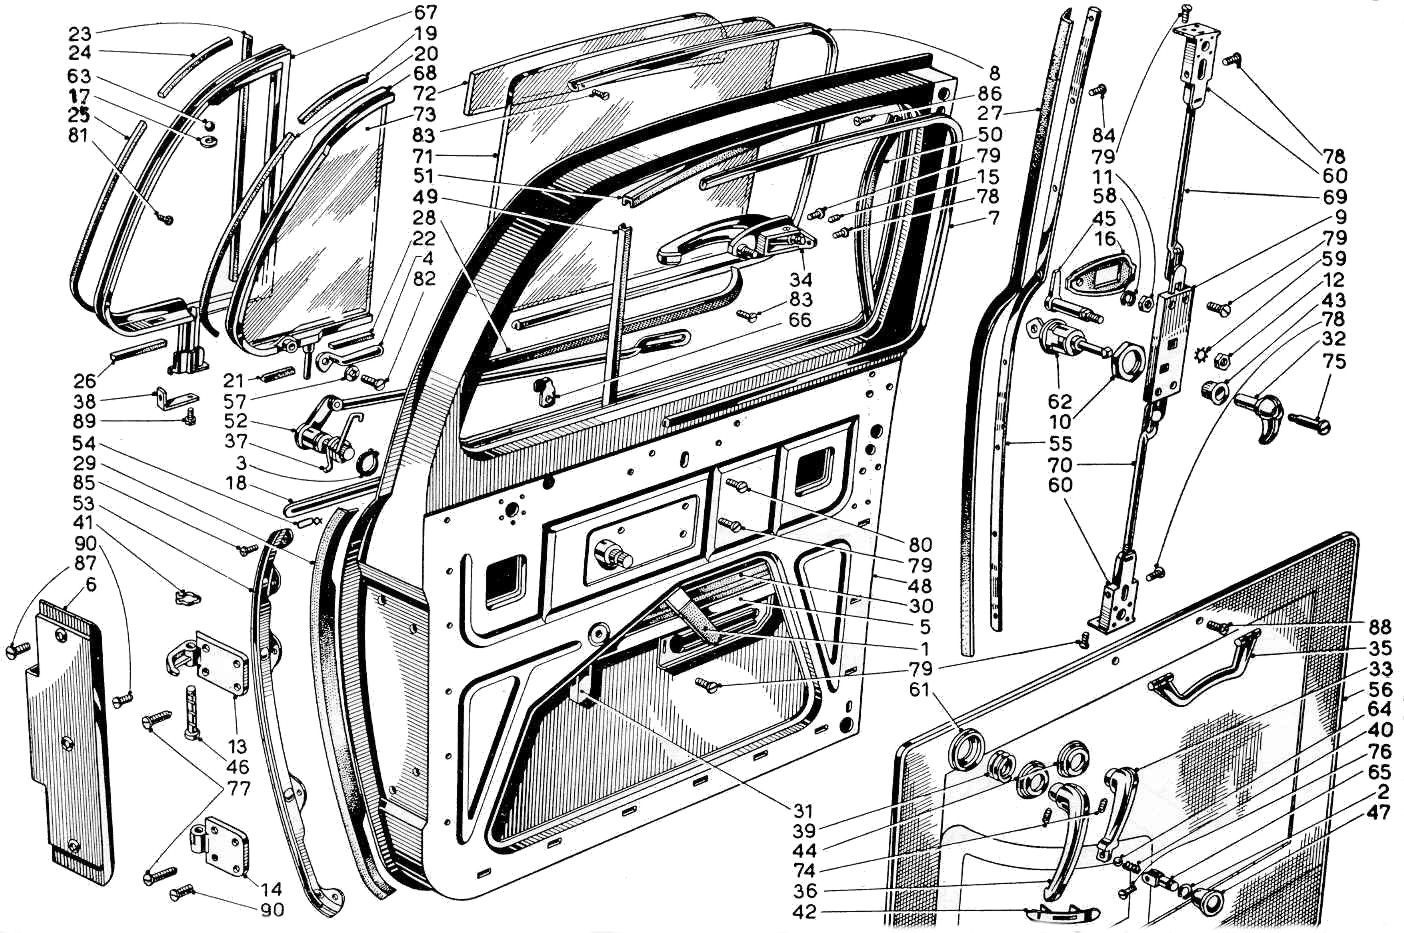
SERIES II CARS – SALOONS~BERLINAS - REAR DOORS
B12 Saloon Rear Door [Tav.67 SII]
B20 SERIES 4 CARS – DOORS - Similar on Series 5 & 6
The following shows the details of the doors on a 4th Series B20 with examples from other series where the information has become available.
Dismantling the door of its fittings after removal of door trims.
Removal of window & mechanism can be done quite easily. Unscrew the four countersunk set screws holding the top rail to the door - red circles in photo below.
Unscrew the four screws holding the window mechanism & strut to the top rail (green circles). Unscrew the 2 set screws on the left side, the 3 fixingsfor the door lock release & the two 11 mm (a/f) nuts at the bottom (all blue circles).
If the window has fitted well, try not to move the nuts nearest the door frame, removing only those nearest the door skin with washers. This should make it much easier on reassembly.
The window & winding mechanism can now be lifted out complete.

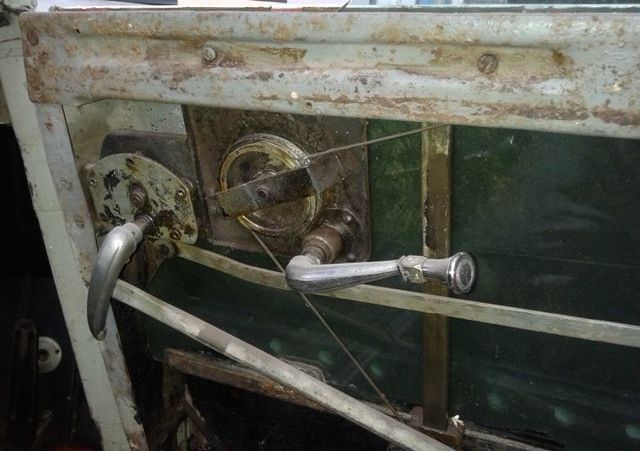
Left-hand side of right door before top rail removed... Note door handle & cranked window winder handle for the driver's-side door.
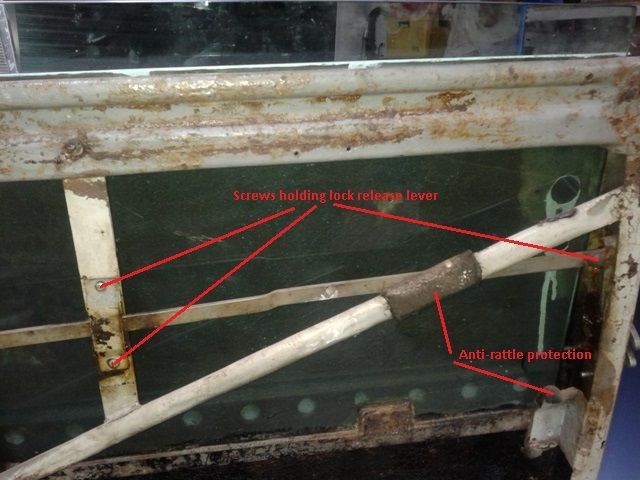
Right-hand side of right door before top rail removed. Note anti-rattle material for bottom of window & for door lock release lever.
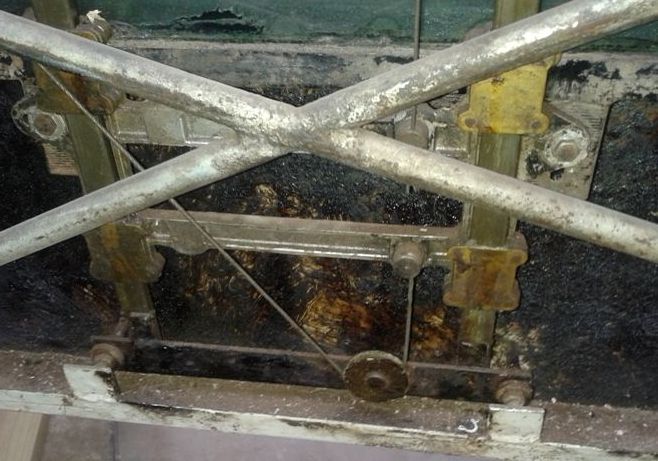
Fixing of window winding mechanism to bottom of door on 2 studs & held by nuts & washers either side... Note cast alloy & brass structure on parallel steel bars. This is different to earlier B20's but the same as later Series.
B20 SERIES 4 CARS – DOOR TRIMS - Similar on Series 3, 5 & 6
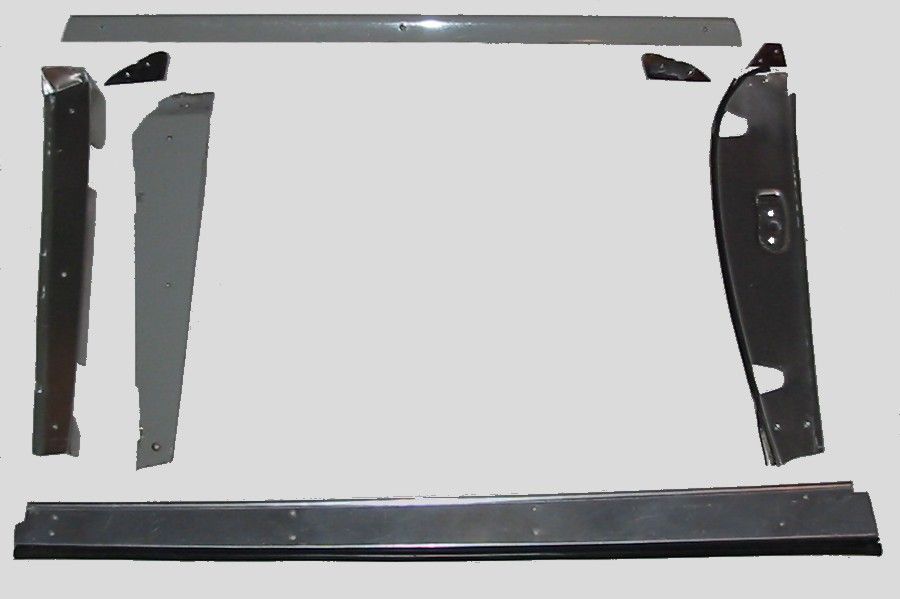
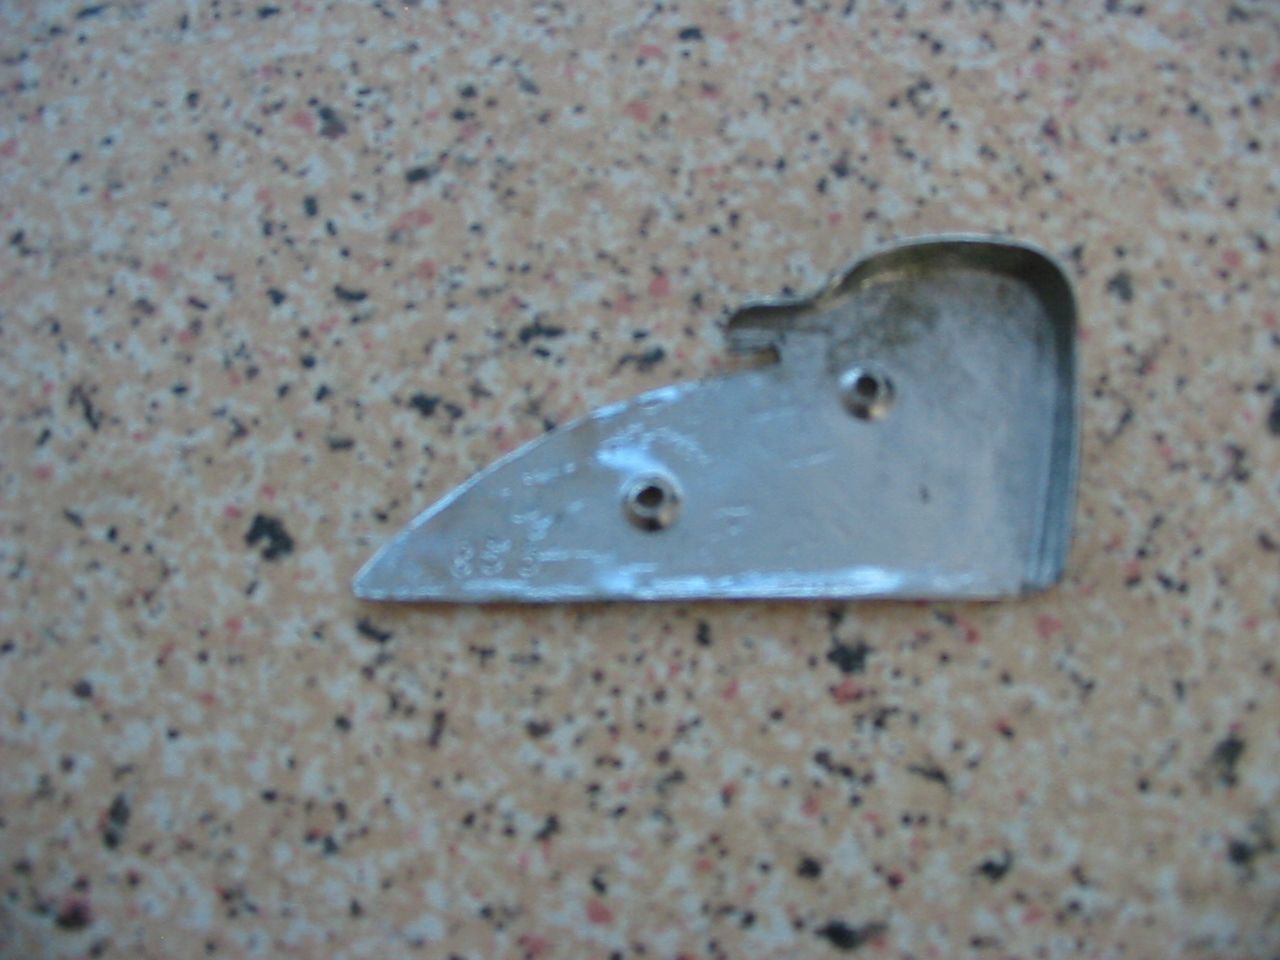
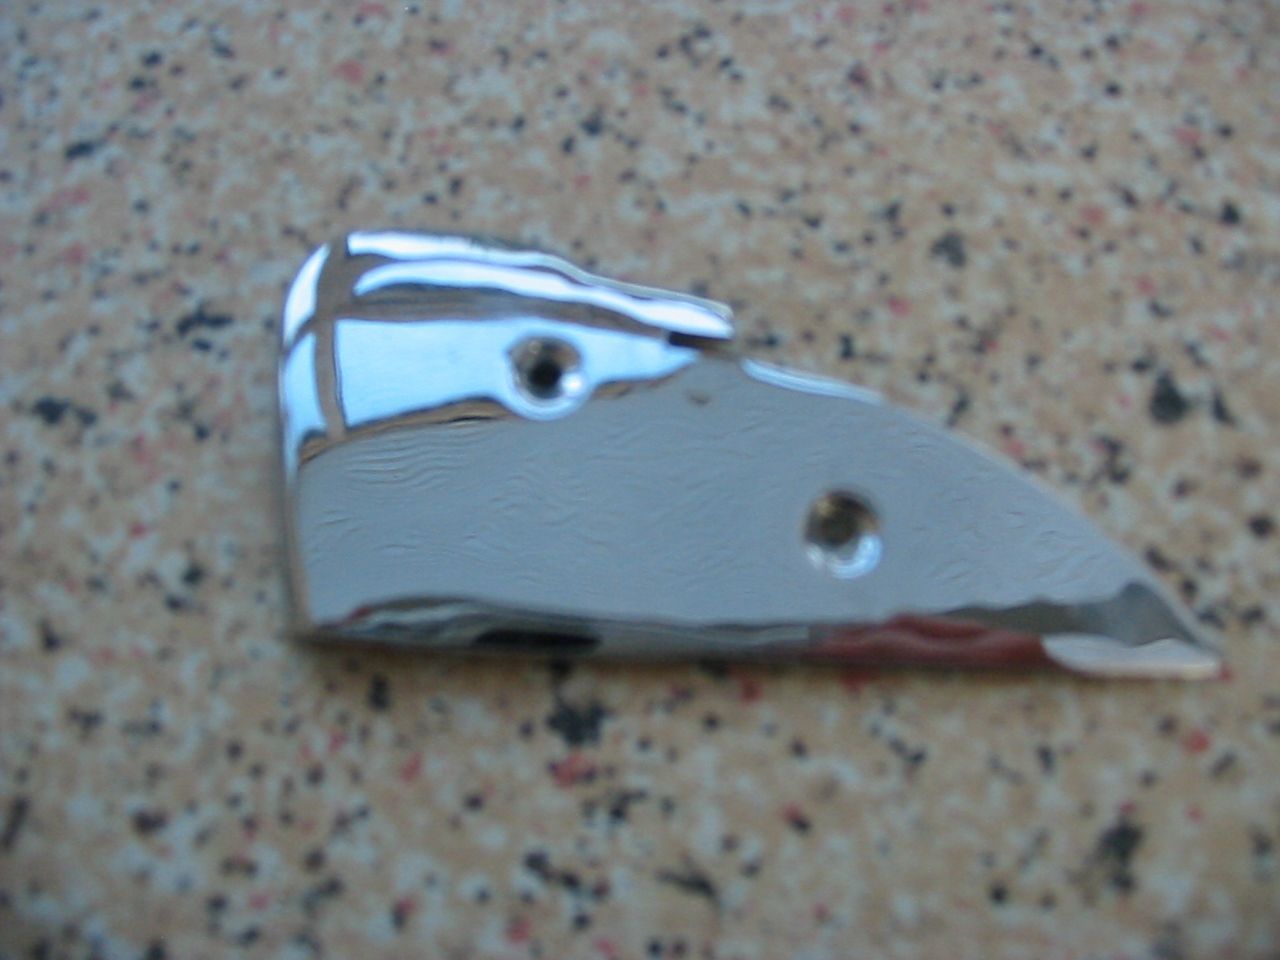
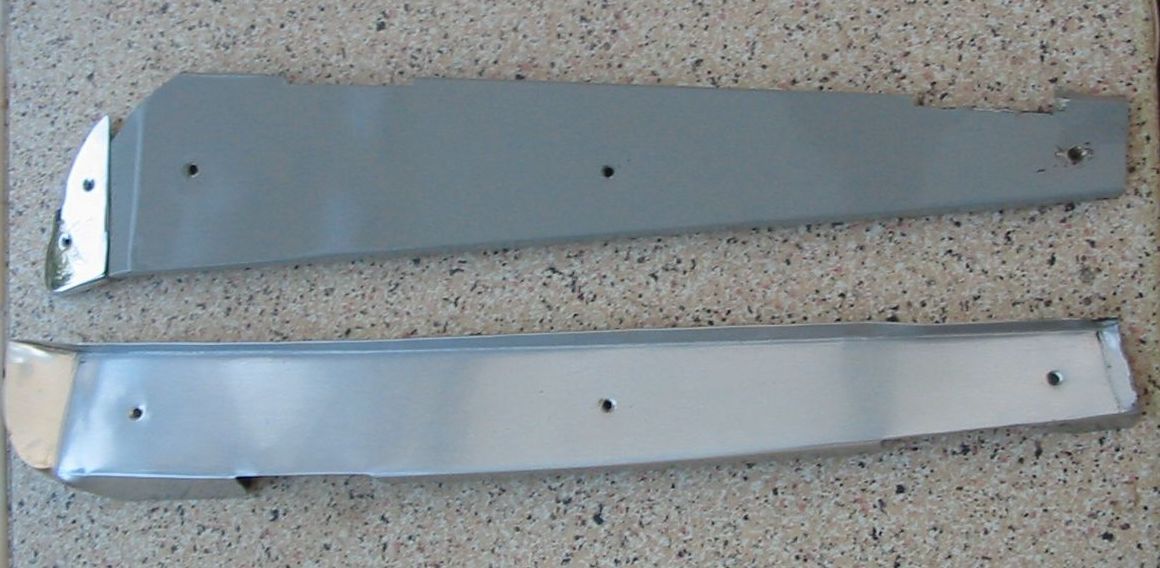
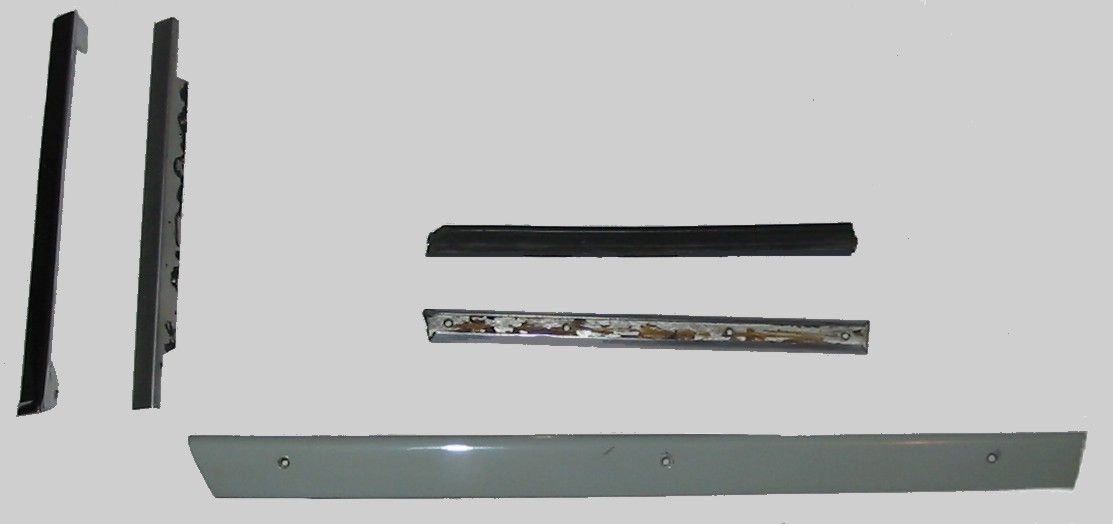
Right-hand side door furniture on B20-3609.
Shown at top is the painted embellishment at the top of the door - it is stamped with an assembly number found elsewhere on the trim items. Below are the three, chromed covers. At the bottom is the alloy sill cover with its rubber weather seal.
In this case the alloy has been polished as have the door end cover on the right, which also has a weather seal, & the front cover on the left, which covers the hinges. The other cover on the left is painted aluminium & fits on the front edge of the door.
Windscreen
Both laminated & toughened glass screens were used, but it appears that the earlier cars are more likely to have been fitted with toughened glass.
B20 Series 1 to 3 had their screens fitted into a chromed brass frame with an aluminium angle ring fitting inside the frame and held in with screws.
This frame assembly is screwed into hole in the bodyshell with small PK (Philips) screws.
S2 and S3 front screens were the same, with S1 being different (part no. B 10-98011A). There is no mention of tinted glass in the parts book.
S1, S2 and S3 rear screens each have different part number – see table below.
B20 4th series (to B20-3696, B20S-1255) were fitted with tinted glass all round. B20 S5 & S6 cars had clear screens, which are larger than on S4 cars.
The spare parts catalogue (August 1959) does not show tinted glass for B24 cars.
At present it is not certain that B20 S3 and S4 front screens are inter-changeable, although there is a recent suggestion that the front screens for all S3 to S6 are interchangeable. Although the part numbers are different, looking at Tavs. 64 and 65 below will show that the method of fixing to the car was quite different, the other main variables only seem to be toughened vs. later laminated glass and clear vs. tinted.
I have a clear screen exactly the same dimensions as my original tinted B20 S4 screen, which I obtained from a windscreen supplier in the 1970s.
Rear screens for B20 S4, S5 and S6 followed the same scheme as for the front screens – see part numbers below
Table of Front & Rear Screen Part Nos. and Dimensions
Front Screens
| Old Part No | New Part No. | Model Application | Dimensions – Width/Depth mm at widest point & on the outside curve of the screen |
|---|---|---|---|
| B 10-98011A | n/a | From B10-2936, B21-1039. Probably also fits B21, B22 & B20 Series 1 There was an earlier part, B10-98011 which had different screw fixings for the frames & a different rear screen | |
| T 62-1500/3 | n/a | From B20-1501 (B20 S2 & S3) front screen with seal T62A-1550/5A & cornice T62-1500/6 | |
| T 62A-1500/1 | 2159193 | To B20-3696, B20S-1255 (B20 S4) tinted front screen, with seal 2159157 & cornice 2159197. The Series 4 cornices were definitely of aluminium alloy | 1155 x 370 mm (approx.) |
| T 62B-1500/1 | 2159194 | B20 S5 & S6 front screen - clear S5 cars (to 3816/1435) had seal 2159157 & cornice 2159197 (alloy?) S6 cars had seal 2159196 & cornice 2159198. S6 cars had chromed brass cornices |
Rear Screens
| Old Part No | New Part No. | Model Application | Dimensions – Width/Depth mm at widest point & on the outside curve of the screen |
|---|---|---|---|
| T 62-1502/3 | n/a | B20 S1 rear screen | |
| T 62A-1502/3 | n/a | B20 S2 rear screen | |
| T 62B-1502/3 | n/a | B20 S3 rear screen | |
| T 62C-1502/1 | 2159200 | B20 S4 tinted rear screen | 1030 x 450 mm |
| T 62D-1502/1 | 2159201 | B20 S5 & S6 rear screen |
Door and Side Windows:
| Window Glass | Old Part No. | New Part No. | Model Application |
|---|---|---|---|
| Door Windows | T 62-1503/5 | B20 S1 to S3 | |
| T 62B-1503/5 | 2159208 | B20 S4 tinted | |
| T 62C-1503/5 | 2159209 | B20 S5 clear. May be interchangeable with S4 from 3352 | |
| T 62VI-1503/5 | 2159210 | B20 6th clear | |
| Rear Side Windows | T 62-1503/6 | B20 S1 to S3 – not adjustable | |
| T 62B-1503/6 | 2159212 | B20 S4 tinted, adjustable | |
| T 62C-1503/6 | 2159213 | B20 S5 & S6 clear adjustable |
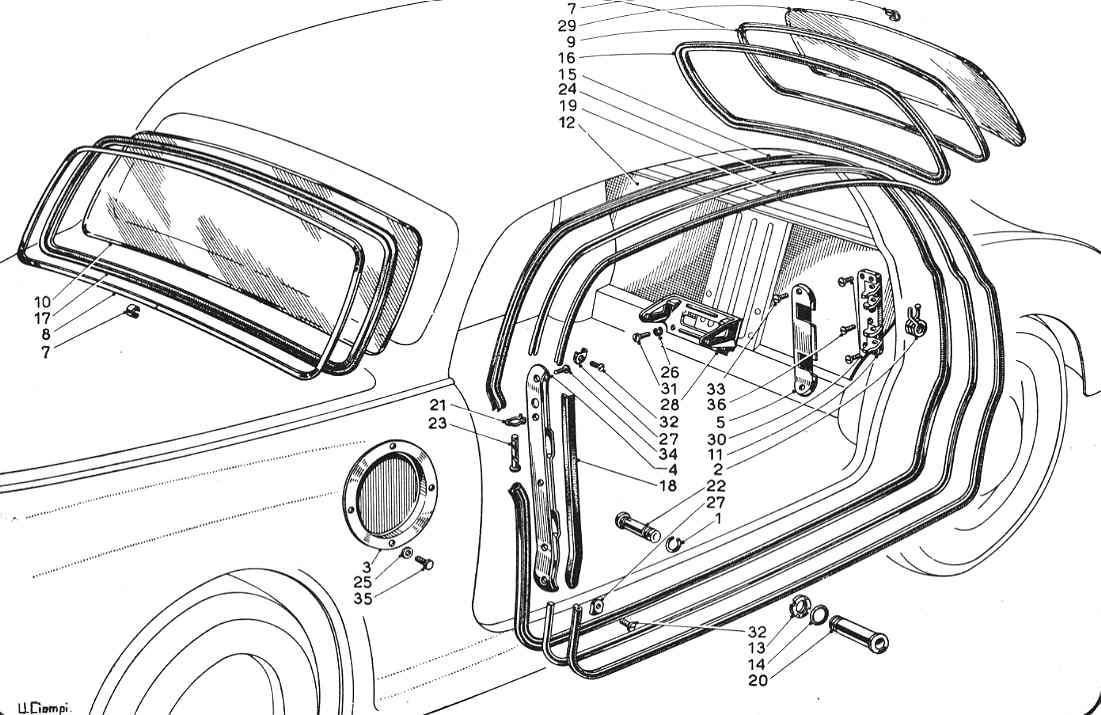
Series I Front and Rear Windscreens, Door Weather Seals and Fittings

Tav. 64-SI
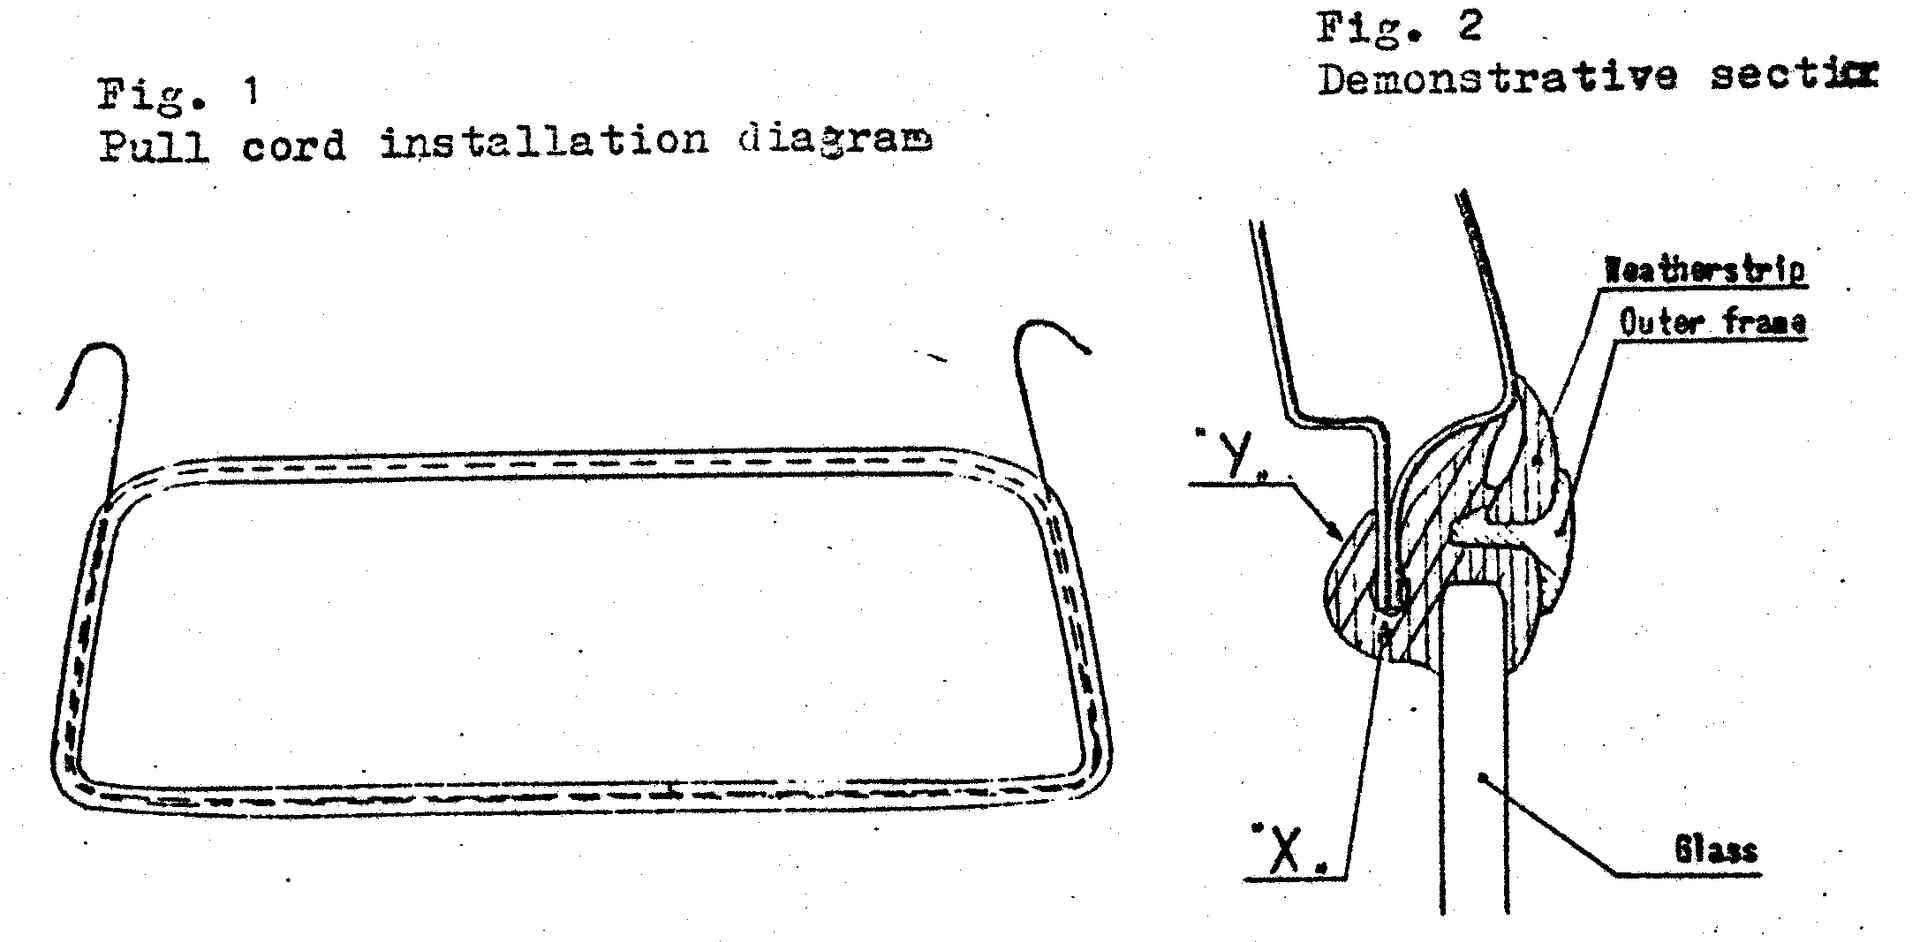
Replacement of Windshield & rear window glasses on SII Aurelias
(From AST Sketch 290)
On B12, B20 from 2952 and Flaminia 813.00 cars the fixing of the front & rear screens was changed to one with a complex rubber weather seal containing a cornice/filler/outer frame with was initially of aluminium alloy & later of chromed brass.
To Remove Screens:
Simply push glass to be removed from inside the car after freeing rubber seal from bodywork and interior trim.
To Install Screens:
- This is a 2-person job. Wrap the weather-strip around the glass and insert the outer frame with the joint cover in its channel. Insert a cord around the weather-strip outer channel "X" (See Figure 2. below) and arrange it as indicated in Figure 1 with both ends overlapping for some length from the top corners of the screen.
- Place the glass, so fitted, in the reveal of the bodyshell, and whilst exerting moderate pressure from outside on the outer edges of the glass, from inside the car pull the ends of the cord one at a time so that the lip of the weather-seal at "Y" in Figure 2 will be forced to snap over the reveal flange.
- With the glass installed, apply a window sealant (originally called F 9000, ICIR 450) between the weather-strip and the glass, and between the weather-strip and the flange
Series II Front and Rear Windscreens, Door Weather seals and Fittings
Tav. 65-SII
Series II B20 4th Series – Side Window Details - Similar on Series 3, 5 & 6
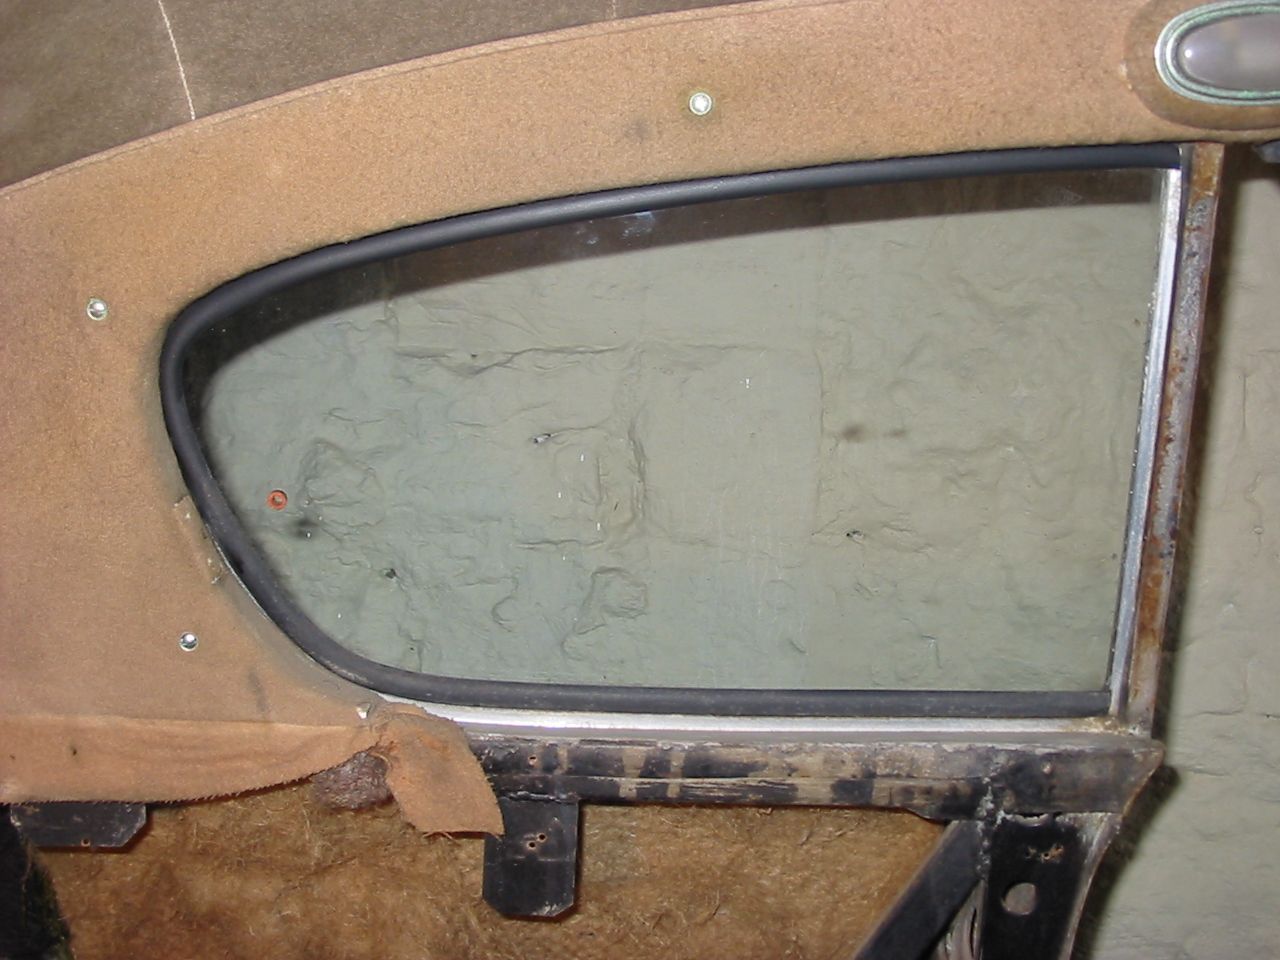
Side window in position, but without rear mounted closing catch
The internal trim on B20-3609 for the right-hand rear side window.
On the left are the internal & external coverings to the door pillar. On a 4th series they are usually in polished alloy, but on later cars they are in chrome. In the centre is the vertical alloy carrier & weather seal. Below is the internal side trim top cover, which is painted – it is also often stamped with an assembly number found elsewhere on the trim items.
Series II B20 4th Series – Front Windscreen Surround &Internal Trim
Similar on Series 3, 5 & 6
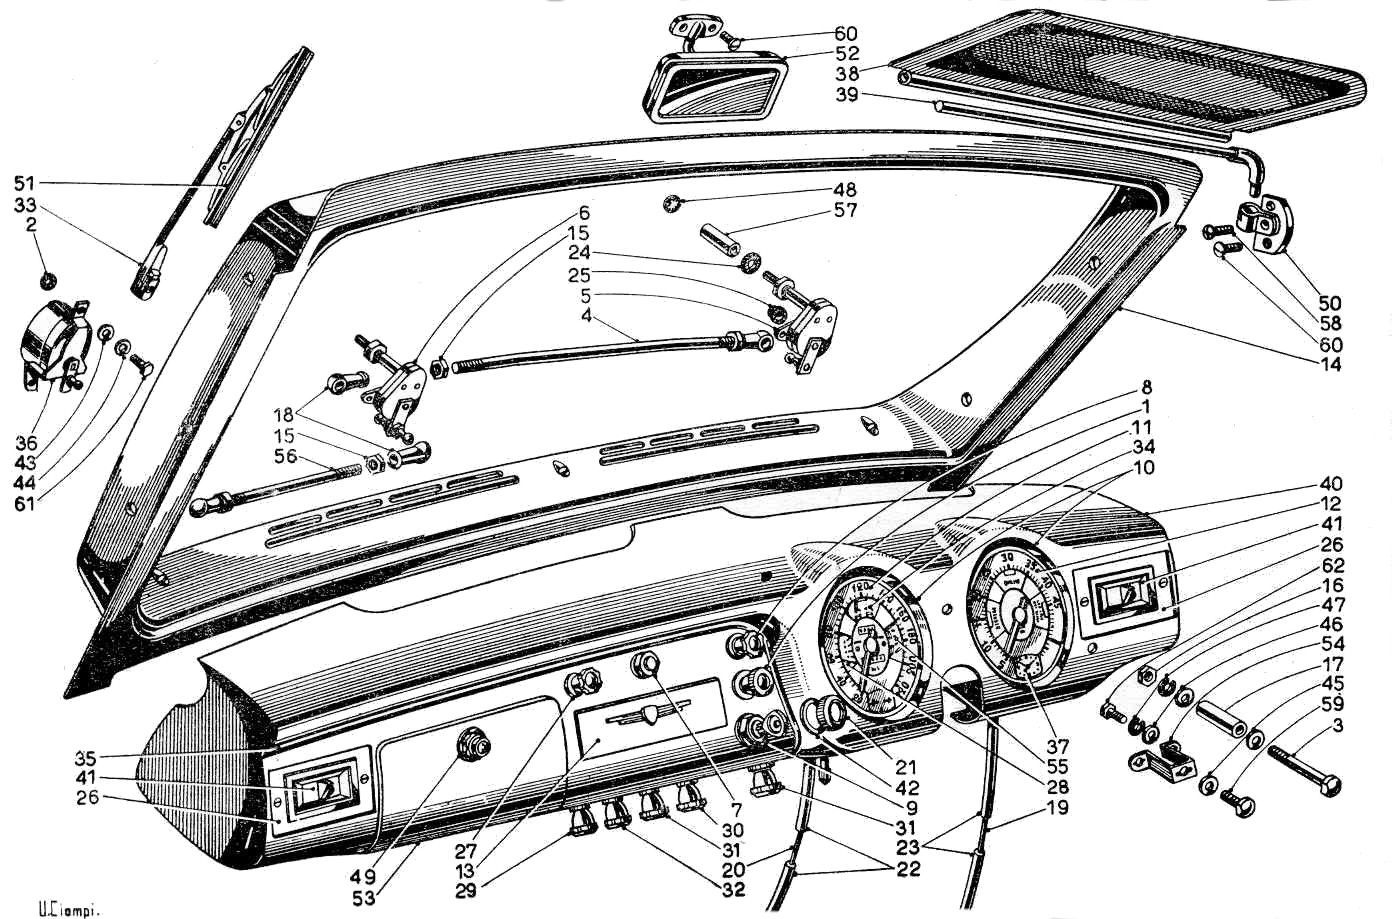
Tav.69bis from the Aurelia SII Parts Book for the B20 5th/6th Series.
The part described in this section is similar to #14.
Example – B20 Fourth Series (B20-3609):
The surround moulding is made of aluminium sheet, reinforced at the mounting screw holes. There are 10 screws, 3 at top & bottom & 2 each side. They are chromed, self-tapping, countersunk, raised-head, slotted screws with an outside diameter of 3.5 mm. There are 3 lengths as in the following diagram (overall length from top of head to bottom tip).
The 4 side screws Θ go into little wooden blocks mounted on the screen pillars & are 19.5 mm.
These screws
Θ are 25.5 mm, & the centre screws
Θ are 33 mm long.

Views of Interior Windscreen surround
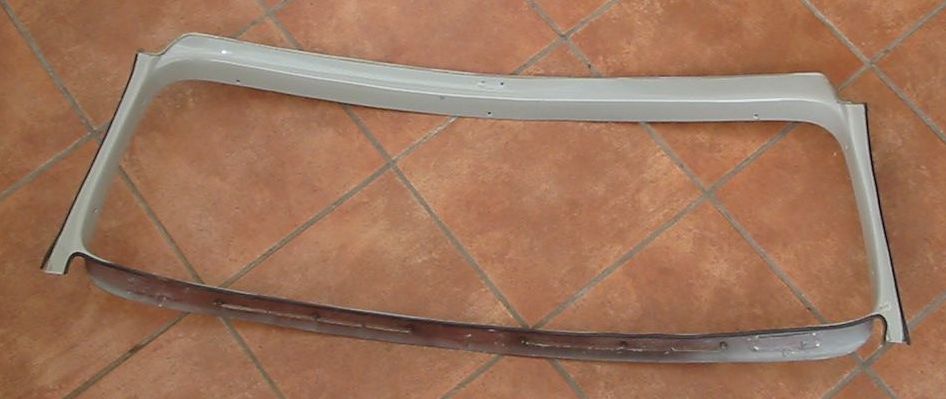
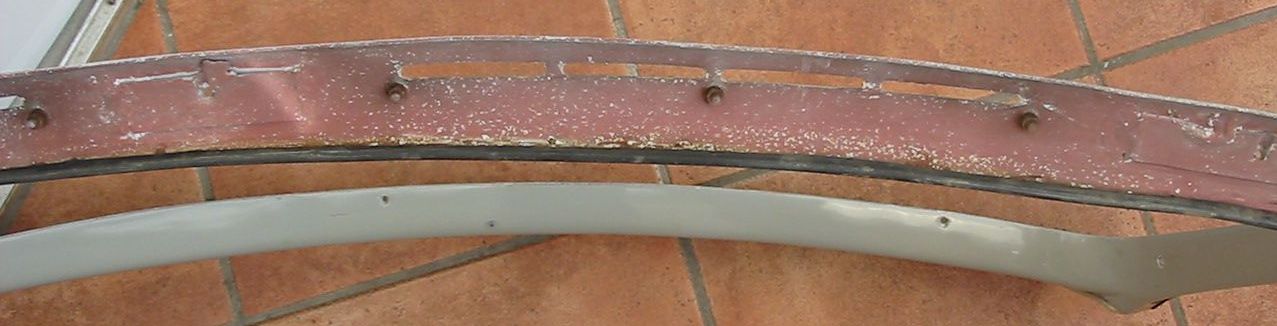
View from inside car. Note that along the bottom & side edges there is a rubber moulding. Length required is 2 metres & the moulding is 4 mm wide on the outside & 7 mm on the reverse to which it is glued. The painted alloy sheet into which the rubber is inserted is about 2.5 mm thick. Along the top edge there is a cloth piping in the colour of the roof lining & as the next photo shows this is glued to the other side.
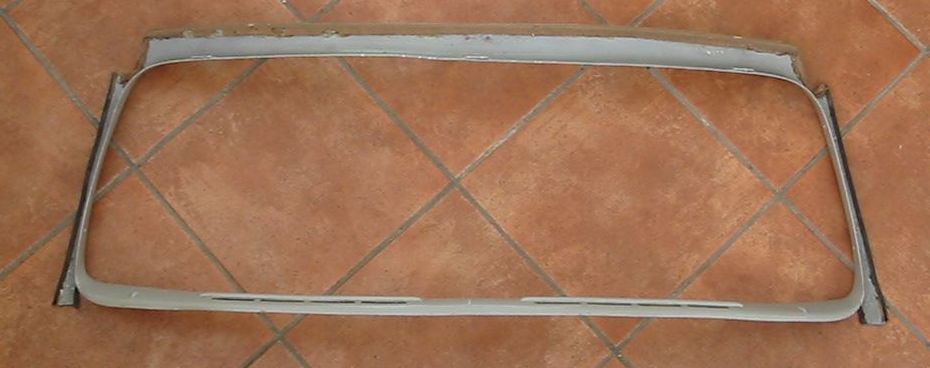
Reverse view of surround. Note reinforcements along inside of top edge at screw holes & the two air vents along the bottom edge – see below.

Air vents in lower part of surround. These are removable – see below.
Notes:
- Welded reinforcements on the inside side of this windscreen trim.
- Each air vent moulding is attached to the surround by three 4 mm studs with 7 mm nuts. Note also the stiffener plates to either side of the vent.
- The small section rubber edge moulding at each side & at the bottom where the surround faces the windscreen.
- The trim is painted the external colour of the car.
- The top edge of the surround has a piece of piped cloth glued to its inside surface. The material is the same as the roof lining cloth.
- The windscreen surround on my car is stamped with same Pininfarina number found on many other interior & trim parts (855 in the case of my car B20-3609).